
There’s nothing quite like the smell of fresh, homemade bread filling your kitchen—a scent that evokes warmth, comfort, and the promise of delicious meals ahead. Today, we’re diving into a recipe that has been a beloved family favorite for years: soft-crust sourdough sandwich bread. Not only does this bread have an irresistibly tender crumb and a delicate flavor, but it’s also incredibly simple to make with its no-knead method. Whether you’re a seasoned baker or a kitchen newbie, this recipe will guide you step by step toward creating a loaf that is perfect for everything from morning toast to hearty sandwiches.
In this post, we’ll explore everything you need to know about making this amazing sourdough sandwich bread—from the essential ingredients and detailed directions to helpful tips, variations, and ideas for serving. So, roll up your sleeves, preheat your oven, and let’s embark on a delightful baking adventure together!
The Joy of Homemade Bread
Baking your own bread isn’t just about the final product—it’s about the experience. The process of mixing ingredients, watching the dough rise, and waiting for that perfect golden crust to form is meditative and deeply satisfying. Homemade bread brings a sense of pride and tradition to the table. With this sourdough sandwich bread recipe, you get to enjoy the best of both worlds: the tangy complexity of sourdough combined with the soft, fluffy texture that makes every bite a pleasure.
There’s something incredibly special about sharing a loaf of bread that you’ve crafted with your own hands. It turns an everyday meal into a cherished memory, whether you’re enjoying it with family at breakfast or serving it at a casual lunch with friends.
Why Sourdough Sandwich Bread?
Sourdough bread has been cherished for centuries due to its unique flavor and the natural fermentation process that not only improves taste but also makes the bread easier to digest. The subtle tang of sourdough comes from the natural yeasts and bacteria present in the starter. This bread is particularly suited for sandwiches because its soft crust and tender crumb hold up well against fillings without overpowering them.
In our version, we’ve taken the best aspects of traditional sourdough and combined them with a no-knead approach, streamlining the process without sacrificing flavor or texture. The result is a sandwich bread that’s both versatile and forgiving—a recipe that anyone can master, even if you’ve never kneaded dough before.
Embracing the No-Knead Method
One of the most enticing features of this recipe is its no-knead nature. Traditional bread recipes often require significant effort to knead the dough until it reaches the perfect elasticity. However, by using a no-knead technique, you let time and the natural fermentation process do most of the work. The dough is gently mixed by hand and allowed to rest, which promotes gluten development naturally. This approach not only simplifies the process but also creates a light and airy texture that is ideal for sandwich bread.
The magic happens during the long, slow rise—first overnight and then a second time after shaping the loaf. This extended fermentation not only enhances the flavor but also improves the bread’s structure, ensuring a soft yet sturdy slice every time.
Ingredient Spotlight
Let’s break down the key ingredients and why they matter:
-
Active Sourdough Starter (⅓ cup or 65g):
The heart of sourdough bread, your starter, is a blend of wild yeasts and bacteria that will ferment the dough. Make sure it has been fed within the last 12-24 hours for the best rising power and flavor. -
Warm Filtered Water (1⅓ cups or 300g, 95º-100ºF):
Temperature is crucial here. Warm water activates the yeast in your starter and sugar, but it should not be too hot, as that can kill the beneficial microbes. -
Sugar or Honey (¼ cup or 56g; alternatively, 2 rounded tbsp honey):
This not only sweetens the dough slightly but also feeds the yeast, giving it extra energy to produce carbon dioxide, which helps the bread rise. -
Flour (3½ – 4 cups or 500g bread flour or all-purpose flour):
Bread flour is recommended because of its higher protein content, which contributes to a better gluten structure. However, all-purpose flour can work as a substitute if necessary. -
Extra-Virgin Olive Oil (1½ tbsp or 20g):
Olive oil adds a subtle richness to the bread, enhancing its flavor and keeping the crumb soft. -
Salt (2 tsp or 9g):
Salt not only boosts flavor but also controls yeast fermentation and strengthens the gluten network.
Each ingredient plays a crucial role in creating the perfect balance of flavor, texture, and rise in your bread. With the right proportions and a little patience, these simple ingredients transform into a loaf that feels both indulgent and homey.
Step-by-Step Directions: Your Roadmap to Delicious Bread
Here’s the detailed process to achieve that soft, fluffy, sourdough sandwich bread:
1. Mixing the Dough
Start by combining your active sourdough starter, warm filtered water, and sugar (or honey) in a large bowl. Stir gently until the mixture is smooth. Then add your flour, olive oil, and salt. Mix until a shaggy dough forms. Don’t worry if the dough looks a bit rough at this point—it just needs to come together.
2. Resting Period: Autolyse
Cover the bowl with a damp towel and let it rest for 30 to 45 minutes. This resting period, known as autolyse, allows the flour to hydrate fully and the gluten to begin developing naturally. This step is crucial in a no-knead recipe because it compensates for the lack of vigorous mixing.
3. Stretch and Fold Technique
After the rest, move the dough to a clean surface and finish mixing by hand. This is where you gently stretch and fold the dough a few times. This simple technique helps to further develop the gluten structure without the need for traditional kneading.
4. First Rise: Overnight Fermentation
Place the dough back into your bowl, cover it with a damp towel, and let it rise overnight—about 8 to 10 hours at room temperature—until it has doubled in size. This slow fermentation not only builds flavor but also improves the texture, giving the bread its soft and airy quality.
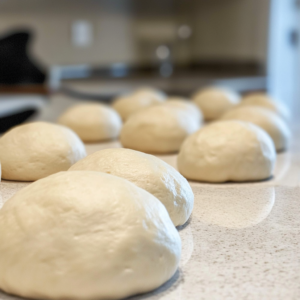
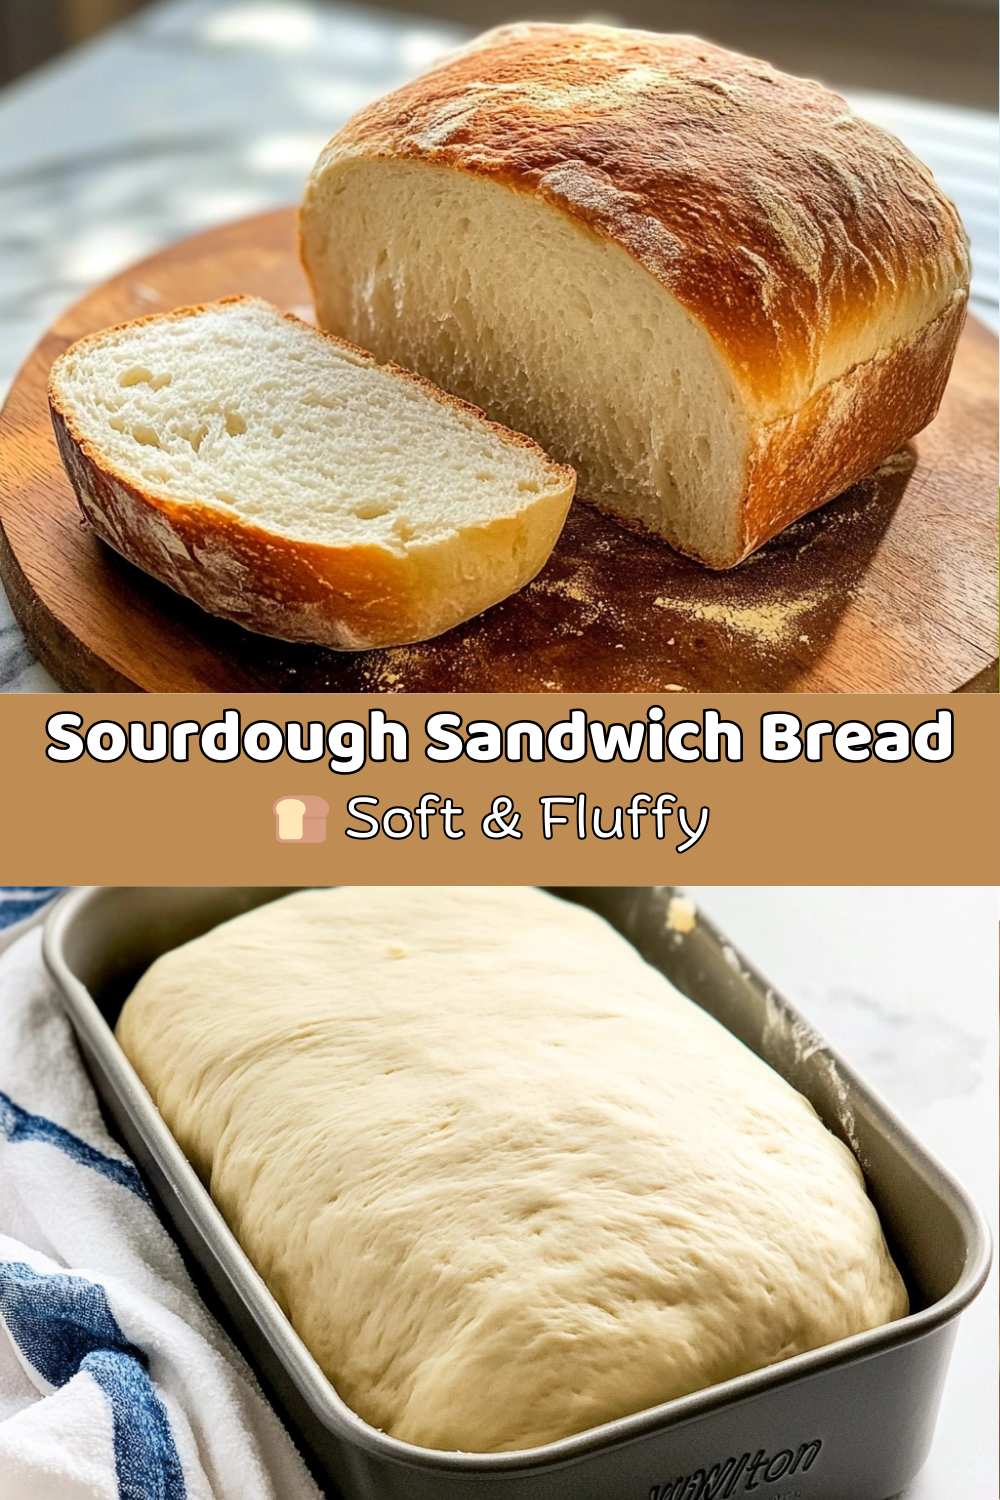
5. Shaping the Loaf
Once the dough has doubled, gently transfer it onto a lightly floured surface. Shape the dough into a loaf, taking care not to deflate the air bubbles that have developed during fermentation. Place the shaped dough into a greased pan, which will help it keep its structure during the final rise and baking.
6. Second Rise: Final Proofing
Cover the pan and let the dough rise for another 1 to 2 hours. This final proofing stage is essential to ensure that the dough is light and airy, setting the stage for a perfectly baked loaf.
7. Baking to Perfection
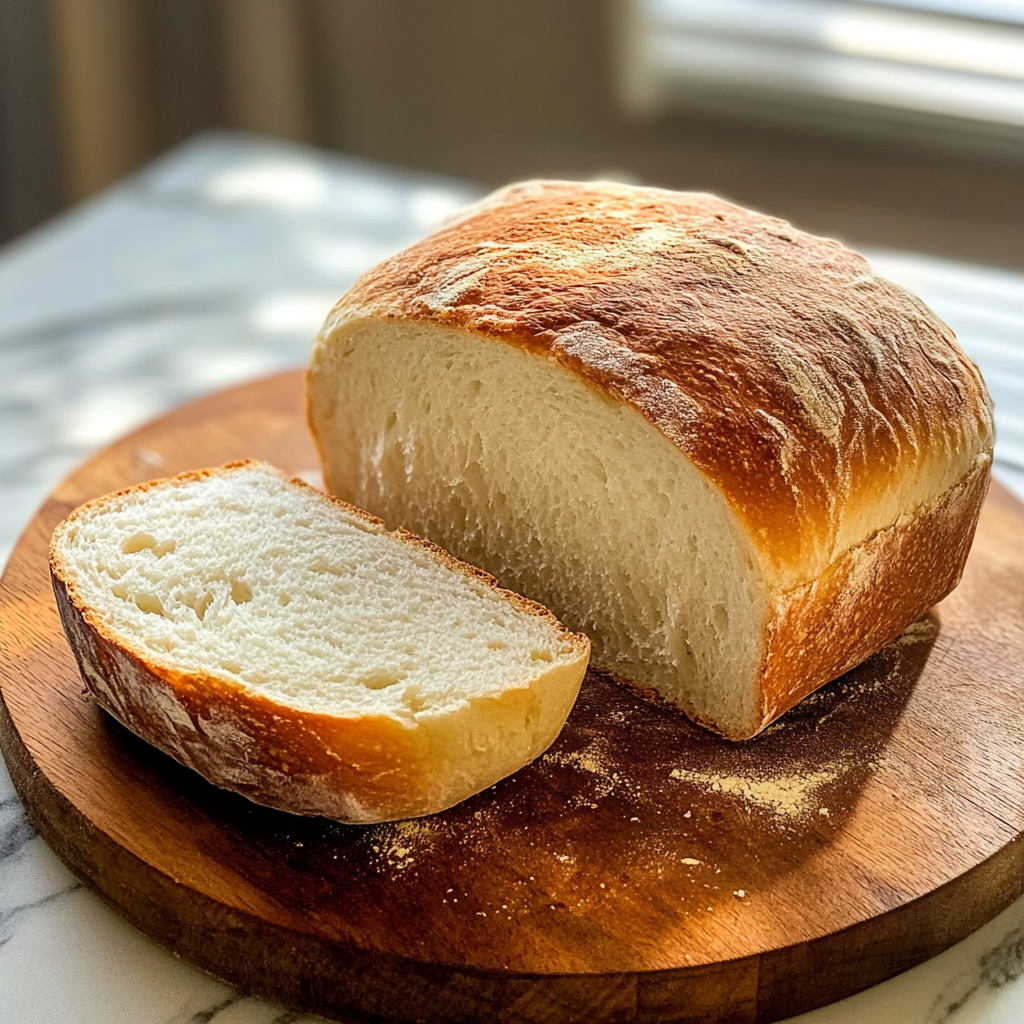
Preheat your oven to 375°F. When your dough has completed its final rise, place the pan in the oven and bake for about 40 minutes. You’ll know the bread is done when it turns a beautiful golden color on top and sounds hollow when tapped on the bottom.
8. Cooling and Slicing
Allow the bread to cool for at least 1 hour before slicing. Cooling is a critical step; it gives the bread time to set, making it easier to slice without compressing the soft crumb. Once cooled, enjoy your homemade sourdough sandwich bread as is, or use it as the base for your favorite sandwich creation.
Tips and Tricks for Success
While the recipe is designed to be beginner-friendly, here are a few extra tips to ensure you achieve bakery-quality bread every time:
-
Starter Health:
Always use a bubbly, active starter that has been fed within the past 12-24 hours. A sluggish starter can lead to a dense loaf. -
Temperature Matters:
The water temperature should be just right—warm enough to activate the yeast but not so hot that it kills it. Using filtered water can also help avoid any chemicals found in tap water that might affect the fermentation process. -
Flour Variations:
Experiment with different flours. While bread flour provides the best structure, mixing in some whole wheat flour can add a nutty flavor and additional nutrients. If you do substitute, keep an eye on the dough’s consistency; you might need to adjust the water amount slightly. -
Patience is Key:
With a no-knead recipe, the rising times are long but absolutely worth it. Resist the urge to rush the process—good things take time, and your bread will be much better for it. -
Handling the Dough:
When shaping your loaf, handle the dough gently to preserve the gas bubbles that give your bread its light texture. Overworking the dough can lead to a denser loaf. -
Storage:
Store your sourdough sandwich bread in an airtight container at room temperature. For longer storage, you can slice the bread and freeze it, toasting slices directly from the freezer as needed.
Creative Ways to Enjoy Your Sourdough Sandwich Bread
This versatile bread is perfect for a wide range of culinary applications. Here are some ideas to get you started:
-
Classic Breakfast Toast:
Simply butter a slice and toast it to perfection. The natural tang of the sourdough pairs beautifully with a smear of jam or a drizzle of honey. -
Hearty Sandwiches:
Whether it’s a turkey club, a vegetarian delight loaded with fresh veggies and hummus, or a classic grilled cheese, the soft crumb and robust flavor of the bread make it an ideal base. -
French Toast:
Transform your sourdough into a decadent breakfast treat by dipping slices in a mixture of beaten eggs, milk, and cinnamon before frying them until golden. The texture of the bread holds up well, absorbing the custard without falling apart. -
Bread Pudding:
Leftover slices can be repurposed into a rich and comforting bread pudding. Combine the bread with a creamy custard, raisins, and spices, then bake until set for a dessert that’s both indulgent and satisfying. -
Dipping Bread:
Use the bread for dipping into soups or stews. Its soft texture makes it perfect for soaking up flavorful broths while still retaining its structure.
Nutritional Insights
Not only is this sourdough sandwich bread a delight to eat, but it’s also a relatively wholesome option compared to many store-bought varieties. Each serving, roughly two slices, clocks in at about 215 calories. The natural fermentation process improves digestibility, and if you opt for whole grain or a blend of flours, you can further enhance the nutritional profile by adding fiber, vitamins, and minerals.
The use of natural ingredients like extra-virgin olive oil not only adds flavor but also contributes healthy fats. Additionally, sourdough fermentation can help lower the glycemic index of the bread, making it a better option for those looking to manage their blood sugar levels.
Reflections on the Art of Breadmaking
Breadmaking is an art form that connects us to traditions spanning generations. Each step in this recipe—from mixing and resting to the final bake—tells a story of patience, care, and the transformation of simple ingredients into something magical. The process is almost therapeutic, inviting you to slow down and savor each moment in the kitchen.
The aroma that fills your home as the bread bakes is a reminder of why we continue to cherish homemade recipes. It’s a sensory experience that transcends the act of eating; it’s about creating memories, celebrating heritage, and even sharing a little bit of yourself with those around you. In a fast-paced world, taking the time to make something as simple as sourdough bread reconnects you with a slower, more mindful way of living.
Variations and Experimentation
One of the best things about this recipe is its adaptability. While the original version is designed to be soft and fluffy with a gentle sour tang, feel free to experiment with add-ins and flavor variations:
-
Herbs and Spices:
Try incorporating dried rosemary, thyme, or even a sprinkle of garlic powder into the dough for an aromatic twist. These additions can elevate a simple sandwich to a gourmet level. -
Seeds and Nuts:
Fold in some sunflower seeds, sesame seeds, or even walnuts for added texture and nutritional benefits. Toasting the seeds lightly beforehand can enhance their flavor. -
Cheesy Delight:
For a richer bread, consider mixing in a handful of grated cheese—cheddar or parmesan works wonderfully. This version makes for a delightful twist on a grilled cheese sandwich or a cheesy bread side dish. -
Whole Grain Twist:
Substitute a portion of the bread flour with whole wheat flour. Not only does this add a nutty flavor, but it also increases the fiber content, making your bread even healthier. -
Sweet Variations:
If you have a sweet tooth, a slight increase in sugar or honey, along with the addition of a handful of raisins or dried cranberries, can turn this bread into a subtly sweet treat that pairs well with morning coffee.
These variations provide endless opportunities to tailor the recipe to your taste and dietary needs. Experimentation in the kitchen often leads to delightful surprises and unique signature recipes that can be passed down through generations.
Troubleshooting Common Issues
Even though this recipe is designed to be beginner-friendly, you might encounter a few hiccups along the way. Here are some common issues and how to address them:
-
Dense or Heavy Bread:
If your bread turns out denser than expected, it might be due to an underdeveloped starter or insufficient fermentation time. Ensure your starter is active and give the dough enough time to rise. Avoid overworking the dough during shaping to maintain the airy texture. -
Crust Too Hard:
A hard crust can result from overbaking. Check your bread a few minutes before the recommended time and adjust as needed. Remember, the residual heat will continue to cook the bread slightly even after you remove it from the oven. -
Sour Taste Overwhelming:
The tanginess of sourdough can sometimes be too pronounced if the starter is particularly strong or if the dough ferments for too long. Experiment with slightly reducing the fermentation time or using a milder starter if you prefer a less sour flavor. -
Difficulty Shaping the Dough:
If your dough feels too sticky or unwieldy, lightly dust your hands and work surface with flour. The dough’s stickiness is natural and will ease up as it bakes, so handle it gently to retain the bubbles that make it fluffy.
Final Thoughts
Baking bread is more than a culinary activity—it’s a journey that invites creativity, mindfulness, and a connection to the age-old tradition of making something from scratch. This soft & fluffy sourdough sandwich bread recipe embodies these values by combining simplicity with deep, comforting flavors. Its no-knead method ensures that anyone can achieve great results, while its endless adaptability makes it a canvas for your culinary creativity.
From the warm aroma that fills your kitchen to the delightful taste of each slice, this sourdough sandwich bread is sure to become a staple in your home. Whether you enjoy it as a simple breakfast toast, transform it into a gourmet sandwich, or experiment with your favorite flavor additions, the joy of homemade bread will shine through every bite.
So, gather your ingredients, follow the steps with care, and let the magic of fermentation work its wonders. With a little patience and passion, you’ll create a loaf that not only nourishes the body but also warms the heart—a true testament to the timeless art of breadmaking.
Happy baking, and here’s to many delightful mornings and shared meals filled with the comforting taste of your homemade sourdough sandwich bread!
Print
🍞 Soft & Fluffy Sourdough Sandwich Bread
- Total Time: 13h 45m (including rising)
- Yield: 16 slices 1x
Ingredients
- ⅓ cup (65g) active sourdough starter (fed within 12–24 hours)
- 1⅓ cups (300g) warm filtered water (95º-100ºF)
- ¼ cup (56g) sugar or 2 rounded tbsp honey
- 3½ – 4 cups (500g) bread flour or all-purpose flour
- 1½ tbsp (20g) extra-virgin olive oil
- 2 tsp (9g) salt
Instructions
1️⃣ In a large bowl, mix starter, warm water, and sugar. Stir in flour, oil, and salt until a shaggy dough forms.
2️⃣ Finish mixing by hand, then cover with a damp towel and rest for 30-45 minutes.
3️⃣ Stretch and fold the dough, then let rise overnight (8-10 hours) at room temp until doubled.
4️⃣ Shape into a loaf, place in a greased pan, and let rise 1-2 more hours.
5️⃣ Preheat oven to 375°F. Bake for 40 minutes until golden.
6️⃣ Cool for at least 1 hour before slicing. Enjoy!
Nutrition
- Calories: 215 calories per 2 slices