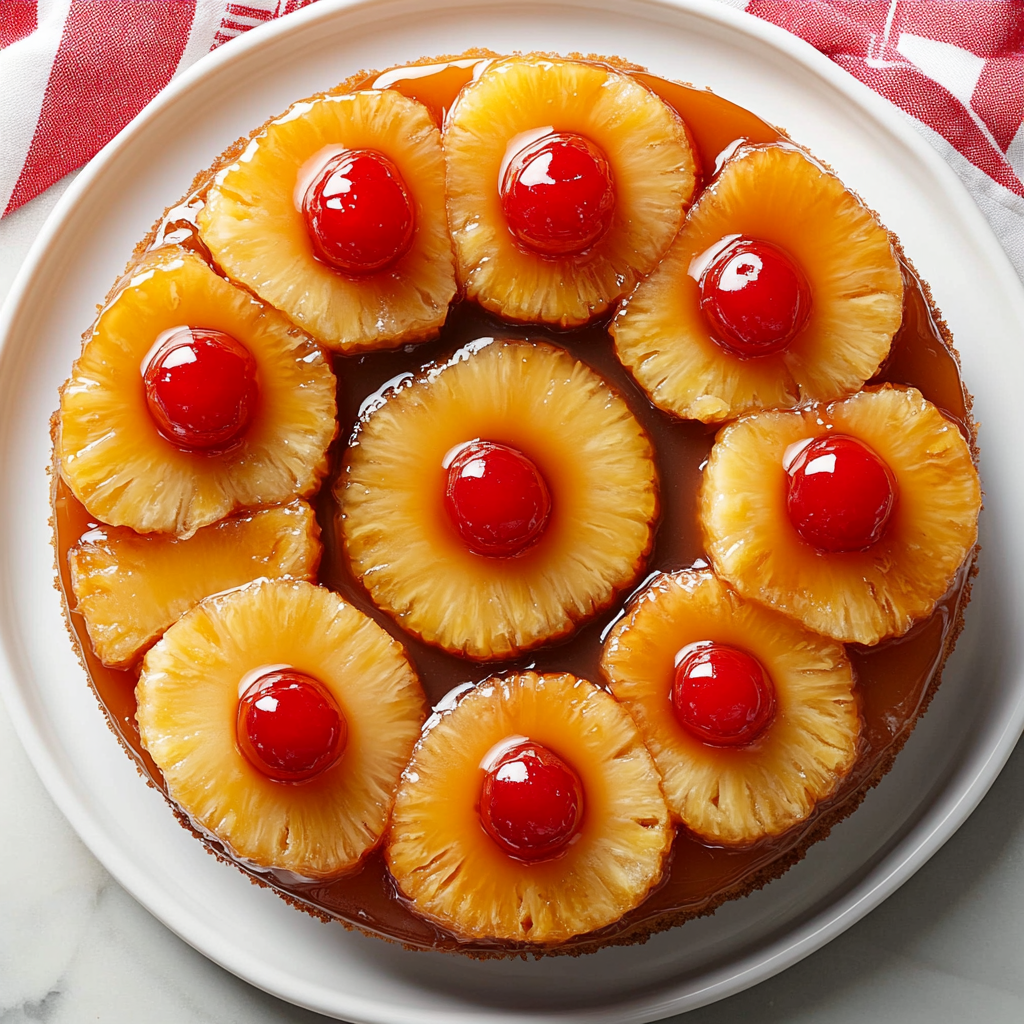

🍍 Pineapple Upside-Down Cake – A Sweet Slice of Nostalgia 🍒
There’s just something magical about the good old-fashioned Pineapple Upside-Down Cake that instantly takes me back to Grandma’s cozy kitchen. A sweet memory wrapped up in caramel, pineapple, and fluffy buttery cake—it’s happiness baked into a pan! I’m so excited to share this dreamy dessert recipe with you today. Trust me, once you take that first bite, you’ll be instantly transported to simpler, sweeter times.
Ready to bake some sunshine, friend? Let’s jump right in!
🎞️ A Sweet Memory: Grandma’s Kitchen Magic
When I was a kid, weekends at Grandma’s house were guaranteed fun. But, one of my all-time favorite memories? The irresistible aroma coming from her tiny oven—the sweet smell of caramelized pineapple, buttery brown sugar glaze bubbling and baking golden-brown cakes as we played board games at her old kitchen table.
My siblings and I would hover around the oven, impatiently waiting to see that famous “flip” moment. Grandma would dramatically invert the cake onto her vintage floral serving plate, hold her breath, and lift the pan. The reveal was always met with cheers, giggles, and lots of sneaky, pre-serving finger dips of caramel. It was an occasion every single time, warm and comforting, the kind of thing that stuck with me my whole life.
Now, I find myself recreating that same special memory in my own kitchen—with my kiddos around me, sneaking cherries, giggling as we flip the cake, just like Grandma taught me.
Ready to pass along that magic memory to your own family table? Tie on your apron and let’s bake!
🍰 Ingredients You’ll Need (Makes 1 x 9-inch cake | Serves 8–10)
Part of the beauty of Pineapple Upside-Down Cake is that it only requires simple, everyday ingredients. Check off your pantry staples:
For the Caramelized Topping:
– Cooking spray (so your cake doesn’t stick!)
– 4 tbsp unsalted butter (butter = happiness!)
– ½ cup packed light brown sugar (for rich, dreamy caramelization)
– 1 (8 oz) can pineapple rings in juice (reserve that juice!)
– 8 to 10 vibrant maraschino cherries (sweet, pop of color)
For the Fluffy Cake:
– 1½ cups all-purpose flour
– 1 tsp baking powder (for a rising, fluffy cake)
– ¼ tsp salt
– 1 cup granulated sugar
– 8 tbsp (1 stick) unsalted butter, at room temperature (soft butter = creamy texture!)
– 2 large eggs
– ½ cup of reserved pineapple juice from the can (so tasty and fresh!)
👩🍳 Easy Step-by-Step Instructions:
Let’s whip this sweet classic together—it’s easier than you think!
1. Prep Oven & Pan
Preheat your oven to 350°F and spray your 9-inch round cake pan lightly with cooking spray.
2. Caramelize It Up!
In a small saucepan, combine butter and brown sugar over medium heat. Stir gently as it melts and bubbles into deep golden caramel-goodness. Pour and spread evenly into your prepared cake pan.
3. Get Fruity!
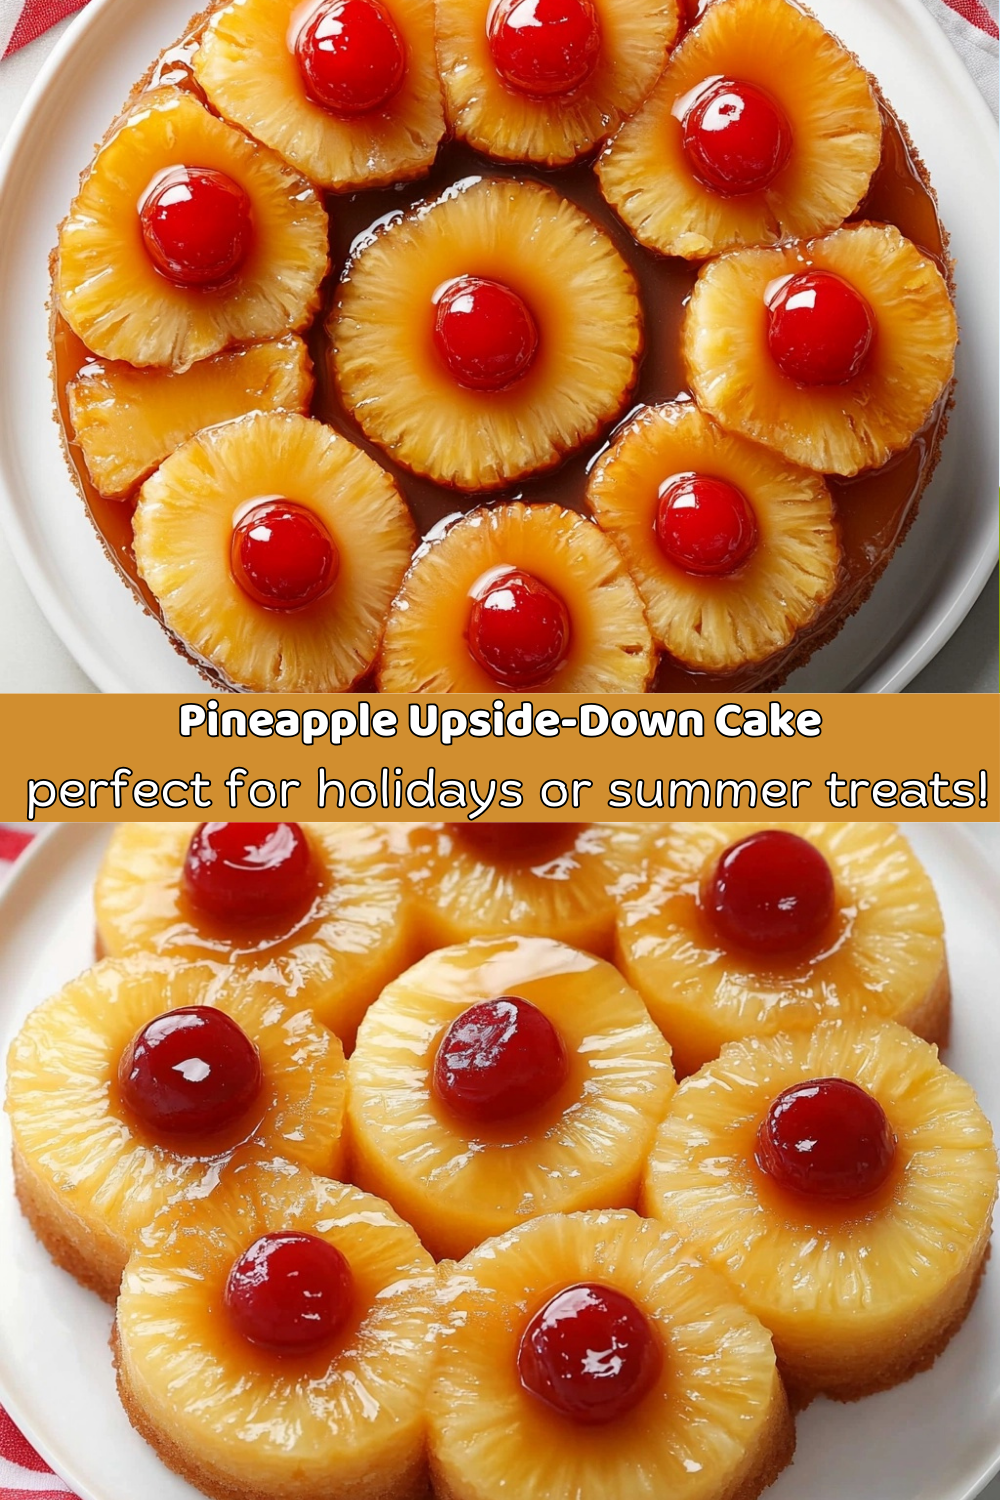
Drain pineapple rings, saving the juice for later. Arrange one pineapple ring in the center of your caramel-coated pan, then nestle 6–7 pineapple rings around it, filling in spaces. Drop a bright maraschino cherry into each pineapple ring hole—pretty sweetness right there!
4. Mix Your Dry Ingredients
Grab a bowl, whisk together flour, baking powder, and salt. Set aside.
5. Creamy Batter Time!
In another bowl or mixer, cream the butter and sugar together until smooth, fluffy, and heavenly (about 5 minutes). Beat in eggs one at a time until creamy smoothness is achieved again.
6. Alternating Magic
On low speed, add your flour mixture and pineapple juice from earlier, alternating in the sequence flour-juice-flour-juice-flour, beating after each addition just until blended. Your batter should be dreamy and smooth.
7. Batter Meets Pan
Gently spoon batter over your pineapple-cherry topping. Smooth it out carefully, being gentle to not disturb fruit placement. Tap the pan lightly on your counter, allowing the batter to settle evenly.
8. Bake to Golden Perfection
Pop your pan into the oven for about 45 minutes. Your cake will turn golden and fragrant, and a toothpick inserted should come out clean.
9. The Big Reveal!
Cool the cake slightly—just 10 minutes. Place a big serving plate upside-down over pan. Hold your breath, flip the pan-and-plate duo, and lift your pan slowly. Watch that delicious topping cascade down—so rewarding!
🍽️ Serving Suggestions:
For maximum deliciousness, serve warm with a scoop of vanilla ice cream, whipped cream, or a drizzle of caramel sauce. But honestly, this cake is also mind-blowing just as it is—classic, retro comfort food perfection.
☀️ Pro Tips from Chef’s Kitchen:
– Double-check your pineapple rings layout before pouring batter—you want it looking gorgeous once flipped!
– To easily invert your cake, gently run a butter knife around the edges to loosen.
– Out of maraschino cherries? No problem—fresh cherries, raspberries, or cranberries work great too!
– If using fresh pineapple, add a tablespoon of fresh lemon juice into the cake batter for a hint of tart brightness.
– Make ahead and warm individual slices in the microwave for 15 seconds—instant comfort!
🥥 Fun Variations:
Feeling adventurous? Add toasted coconut flakes for a tropical upgrade, or sprinkle your cake batter with a pinch of cinnamon or nutmeg before baking. Lovely and cozy!
📋 Nutritional Information (Per Slice, Based on 10 Servings):
– Calories: ~310
– Fat: 14g
– Carbohydrates: 45g
– Protein: 3g
🍽️ Storage & Shelf Life:
Store any leftover (if you manage to have any!) in an airtight container for up to three days at room temperature. Microwaving leftover slices for about 15 seconds will return the warm goodness.
So there you have it—a beautiful, homey dessert perfect for making sweet memories with family and friends. Pineapple Upside-Down Cake has always been, and will always be, timeless dessert perfection. Thank you for cooking alongside me today! I can’t wait for you to fill your kitchens with happiness, too.
Happy Baking, my friends!
#PineappleUpsideDownCake #RetroDesserts #HomemadeGoodness #BakingJoy #ClassicCakes #TropicalDesserts #SweetMemories #FamilyFavorites #EasyBakes #ComfortDesserts #SummerAndBeyond