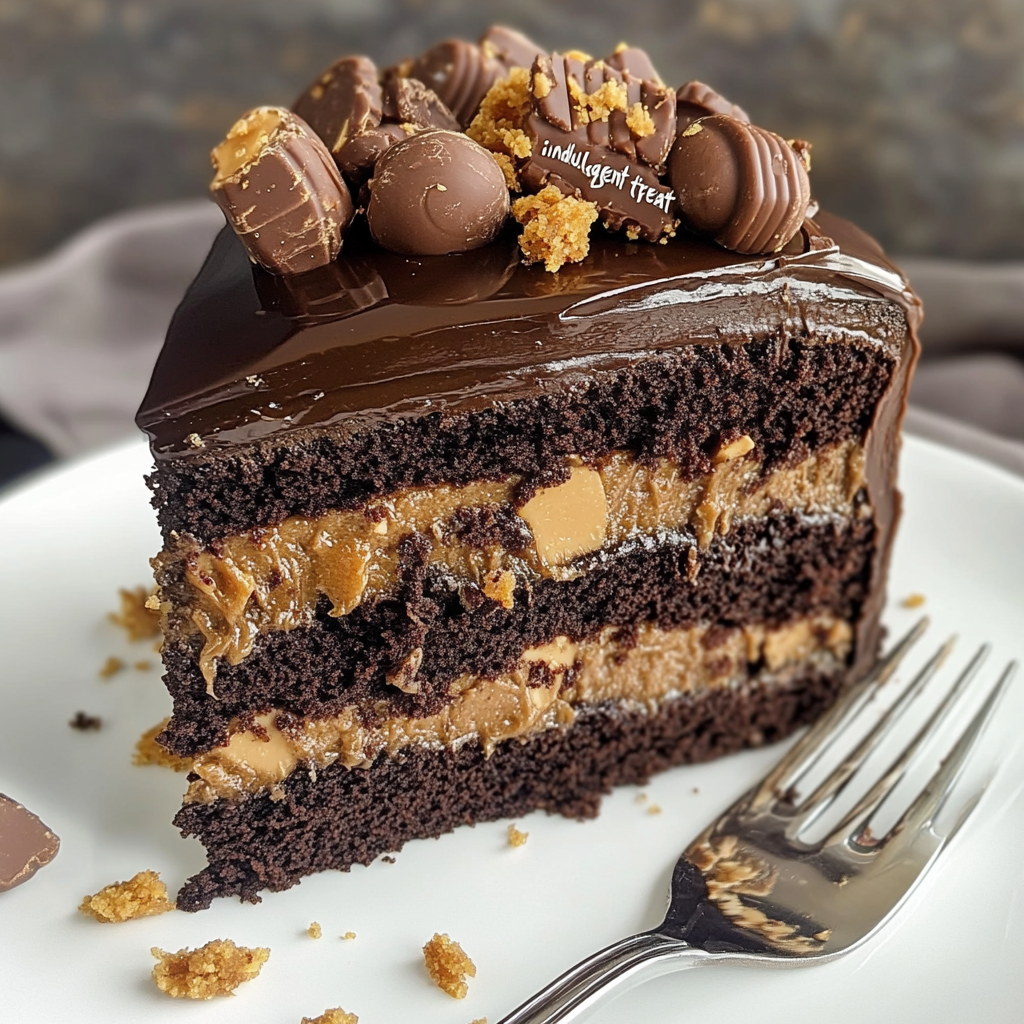

🍫🥜 Peanut Butter Cup Dump Cake: Gooey, Delicious & Dangerously Addictive!
Hey there, sweet friends! Chef Jess here, bringing you another cozy kitchen adventure! Today we’re whipping up something that’s easy, insanely indulgent, and utterly delicious—my famous Peanut Butter Cup Dump Cake! Imagine layers of creamy peanut butter melting into sweet chocolate, sprinkled generously with chopped peanut butter cups, baked into sweet-and-gooey blissiness. Yep, it’s officially okay to drool. I’ve got your back.
But fair warning—once your family tastes this cake, they’ll ask for it again and again. The first time I took it to a family potluck, it vanished faster than I could blink. When I went back to get my tray, all that was left behind were a few “accidental” spoons, suspiciously clean from all the licking. Yep. It’s that good!
The Story Behind This Dessert Craze 🎉
Let me take you back a bit—several summers ago, I was doing my usual “What crazy yummy dessert can I make last minute?” dance before a family gathering. Life had been busy, and to be honest, I forgot about my promise to show up with dessert until just hours before. Panic surged, but then inspiration struck!
Glancing in my pantry, I spotted chocolate cake mix, peanut butter, peanut butter cups (my secret snack stash, don’t judge!) and the magical ingredient enjoyed by bakers everywhere—sweetened condensed milk. Dump cakes had always been a favorite because they’re fast and foolproof. So, why not peanut butter cup style?
That first creation was a gooey, chocolatey, peanut buttery hit to remember. Seeing the huge smiles and chocolate-smeared fingers around the table made it an instant keeper in my recipe collection!
Alright, enough talk, let’s head to the kitchen!
👩🍳 Ingredients (Serves 12):
This recipe is foolproof and comes together in moments. Here’s what you’ll need:
– 1 box chocolate cake mix (any favorite brand works great!)
– 1 cup creamy peanut butter (smooth and rich—oh yeah!)
– 1 can (14 oz) sweetened condensed milk (hello, sweet dreamy goodness!)
– 1½ cups chopped peanut butter cups, divided (plus extra for garnish—because there’s no such thing as too many!)
– ½ cup melted butter (butter makes everything better!)
– 1 cup milk chocolate chips (semi-sweet works if you prefer!)
– Optional but highly recommended: whipped cream or creamy vanilla ice cream for serving
🔥 Step-by-Step Directions:
Feeling hungry yet? Grab an apron and get ready to bake!
Step 1: Preheat & Prep Your Dish
First up, let’s heat things up—preheat the oven to 350°F (175°C). Grab your trusty 9×13-inch baking dish and lightly grease it. Easy peasy!
Step 2: Layer Up Peanut Butter & Candy
Spread that creamy peanut butter in an even layer across the bottom of your dish. Sprinkle half of those tempting chopped peanut butter cups over it. (Please resist nibbling too many while doing this step, it’s hard, I know!)
Step 3: Sweetened Condensed Milk Shower
Now, pour sweetened condensed milk evenly over your candy and peanut butter layer. Ah, pure joy in liquid form, right?
Step 4: Sprinkle the Cake Mix
Open your chocolate cake mix box and sprinkle the dry powder evenly over the condensed milk. No mixing required here—trust me, it’ll bake up beautifully!
Step 5: Butter & Chocolate Chips Magic
Drizzle that beautiful melted butter right on top, covering all over the cake mix. Scatter chocolate chips and the rest of the peanut butter cups over everything. It already smells amazing, right?
Step 6: Bake to Perfection
Now’s the easy part—pop that dish into the oven and bake for 35–40 minutes. You’ll know it’s ready when the top gets bubbly and slightly golden and crisp. Your kitchen will smell heavenly!
Step 7: Serve Up Warm Deliciousness
Once out of the oven, resist temptation (just a moment!) and let cool for 10–15 minutes. Trust me, it’s even more amazing warm. Scoop right away, top with whipped cream or ice cream, and get ready to indulge in pure bliss!
🍨 Serving Suggestions:
While the cake itself is absolute heaven, here’s how to elevate your dessert time:
– Top each warm serving with whipped cream or vanilla ice cream (the cold contrast is perfection!).
– Drizzle warm fudge sauce or caramel sauce (because, why not?).
– Pair it with a steaming cup of coffee, espresso, or a cold glass of milk. Ultimate comfort zone!
✨ Chef’s Pro Tips & Fun Variations:
I’ve made this cake countless times, playing around with fun add-ins:
– Feeling adventurous? Try sprinkling crushed pretzels or chopped salted peanuts on top right after baking to add crunch and balance out sweetness. Yum!
– For peanut butter overload (is it possible?), drizzle some melted peanut butter cups on top before serving. Yes, please!
– Mix up candy toppings with Reese’s Pieces or peanut butter M&M’s for a colorful, exciting twist.
📝 Storing Leftovers:
Leftovers? Unlikely! But if by some delicious miracle you have some left, here’s the storage guide:
– Store in an airtight container at room temperature for up to 3 days.
– Or, pop it in the fridge and enjoy within 1 week. (Microwave individual servings for 20 seconds to return them to freshly baked goodness!)
🍽️ Nutrition (per serving):
While this dessert is purely indulgent (why else do we bake?), here’s the low-down per serving (approx.):
– Calories: 480
– Total Fat: 25g
– Cholesterol: 35mg
– Carbohydrates: 56g
– Protein: 9g
Indulgent, decadent, and so very worth it. Balance is key—so enjoy some today!
👏 Wrapping it Up:
There you have it, foodie friends! My dangerously delicious Peanut Butter Cup Dump Cake—a dessert that will win you oh-so-many smiles and happy bellies. It’s easy enough to whip up anytime, yet decadent enough to impress even the pickiest dessert lovers.
Don’t forget, the joy of cooking is most deliciously felt with loved ones by your side. So, whip this one up, gather your favorite people around the table, and savor the sweet, gooey goodness that magically brings everyone together.
Got questions, suggestions, or love to share about this recipe? Drop me a note below—I’d love to hear from you! Until next time, happy baking and even happier eating!
Warmest kitchen wishes,
Chef Jess 🍰👩🍳✨