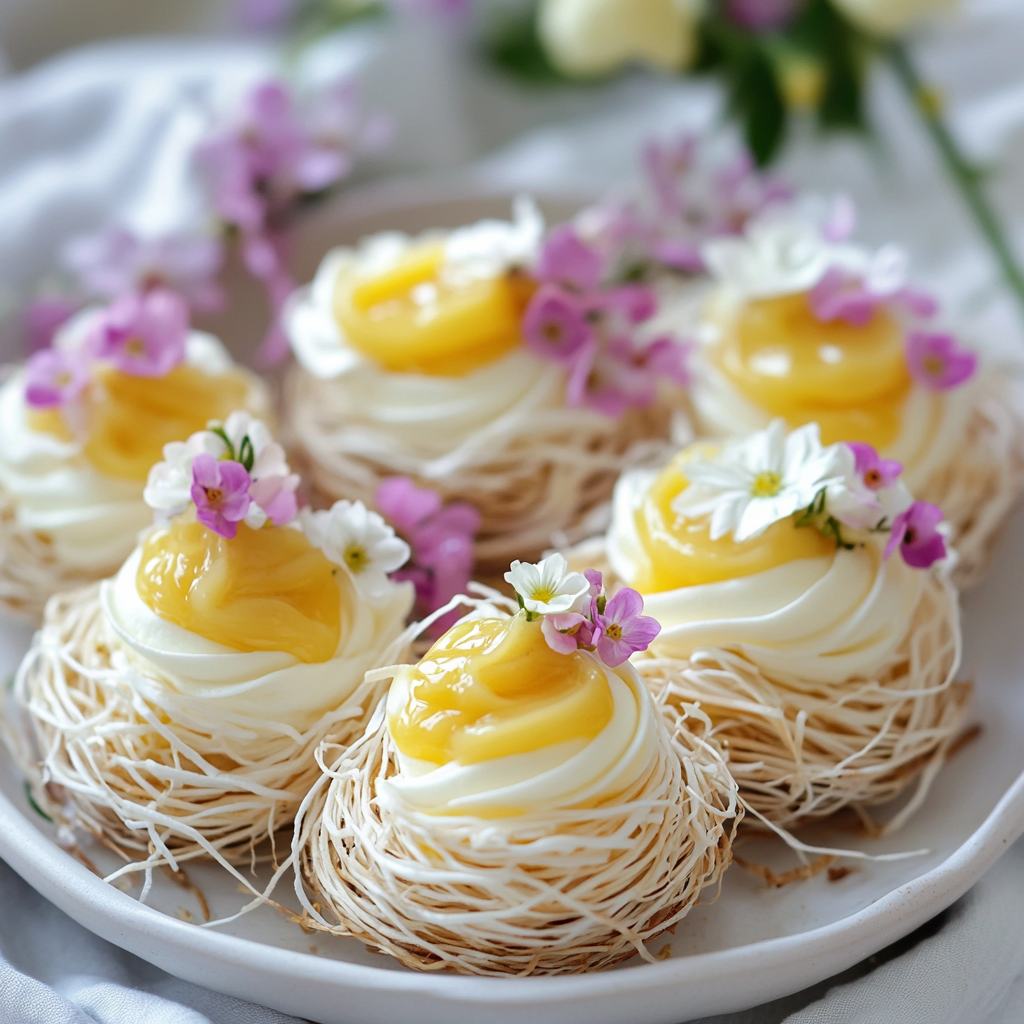

Lemon Curd Meringue Nests: Bite-Sized Sunshine for Your Sweet Tooth
Picture this: golden afternoon light streaming through lace curtains, the soft hum of a vinyl record spinning Fleetwood Mac, and a tiered tray of desserts so delicate they could’ve been plucked from a storybook. That’s where my love affair with lemon curd meringue nests began—sitting at my mom’s wobbly kitchen table, legs swinging under my chair, watching her transform egg whites and sugar into edible clouds.
Fast forward 20 years, and I’m still obsessed with these ethereal treats. Crispy on the outside, marshmallow-tender inside, and cradling a dollop of tangy lemon curd that’ll make your taste buds do a happy dance. They’re like if a lemon bar and a cloud had a lovechild, and honestly? We’re all invited to the baby shower.
Whether you’re prepping for Easter brunch, Mother’s Day, or just want to impress your sourdough starter (no judgment), these nests are your ticket to dessert glory. Plus, they’re gluten-free, naturally low-fat, and customizable enough to make even the pickiest eaters swoon. Let’s turn your kitchen into a springtime pastry shop—apron optional, enthusiasm required!
The Day My Meringue Misadventure Became Magic
Let me take you back to 1998. Nine-year-old me, armed with a whisk taller than my arm, determined to recreate Mom’s famous meringues for the school bake sale. Spoiler: It went… interestingly. I mistook salt for sugar (RIP, batch #1), forgot the cream of tartar (hello, sad pancake puddles), and may have set off the smoke detector. Twice.
But then—magic. On attempt #3, Mom handed me her vintage copper bowl, its surface worn smooth from decades of whipping miracles. “Pretend you’re beating up the ingredients that bullied your brother,” she joked. Suddenly, the egg whites transformed into satiny peaks that held their shape like Olympian gymnasts. We piped swirls onto the sheet, giggling as flour dusted our noses. When those nests emerged from the oven, crisp and golden, I felt like I’d unlocked a secret wizard’s spellbook.
Those imperfect, lopsided nests sold out first at the bake sale. Turns out, a little love (and a lot of sugar) covers a multitude of kitchen sins. Now, I’m passing that spellbook to you—no smoke detectors required.
Your Shopping List, But Make It ✨Sparkly✨
- 4 large egg whites – Fresh is best! Let them sit at room temp for 30 minutes. Pro tip: Save yolks for carbonara or curd! (Vegan? Swap with ½ cup aquafaba—the liquid from canned chickpeas!)
- 1 cup granulated sugar – Superfine works wonders, but regular sugar blitzed in a blender for 10 seconds does the trick!
- ½ tsp cream of tartar – The meringue MVP! Stabilizes those peaks. No tartar? 1 tsp lemon juice or white vinegar works too.
- ½ tsp vanilla extract – Almond or coconut extract would be dreamy here. Or go wild with lavender!
- ½ cup lemon curd – Store-bought is fine (Trader Joe’s FTW!), but try my 10-minute microwave curd if you’re feeling fancy.
- Edible flowers/toasted coconut – Because we eat with our eyes first! Nasturtiums or pansies add Insta-worthy flair.
Let’s Build Some Edible Clouds!
- Preheat & Prep: Crank that oven to 225°F (110°C). Line a baking sheet with parchment—no grease! (Grease = flat meringues = sad chef.)
- Whip It Good: In a spotlessly clean bowl, beat egg whites and cream of tartar on medium until foamy (1-2 mins). Gradually add sugar, 1 tbsp at a time, then crank speed to high. Beat until stiff peaks form—when you lift the whisk, the peak should stand at attention like a tiny Everest. Fold in vanilla gently. (Chef’s hack: Rub a bit between fingers—if it’s gritty, keep whipping!)
- Pipe Dreams: Spoon meringue into a piping bag with a star tip (or a Ziploc with the corner snipped). Pipe 3” circles, building up edges to form nests. No piping bag? Use a spoon to shape wells—rustic is charming!
- Bake & Believe: Bake 1.5-2 hours until dry and liftable. DON’T open the oven early—they’ll collapse faster than my willpower near a cheese plate. Turn off oven, crack the door, and let cool inside for 1 hour. (Patience, Padawan.)
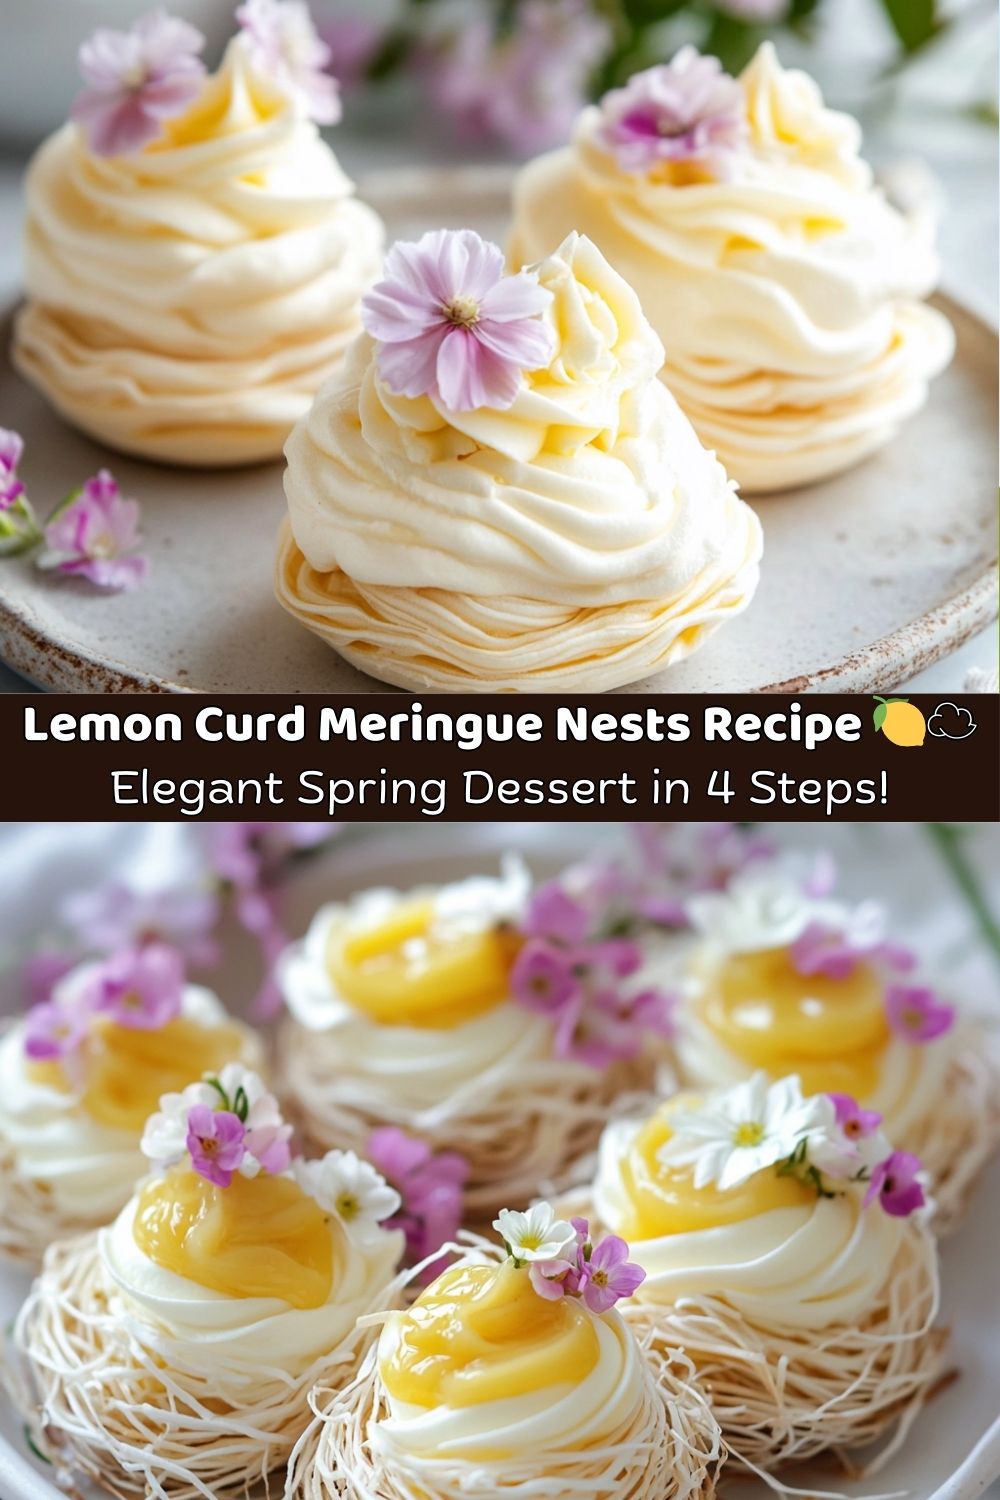
- Fill & Festoon: Once completely cool, spoon curd into nests. Top with coconut, zest, or flowers. Serve within 2 hours—unless you like “weepy” meringues (they still taste amazing!).
Plating Like a Pro (Minimal Effort, Maximal Oohs!)
You don’t need a pastry degree to make these Lemon Curd Meringue Nests look like they belong in a French patisserie. The secret? A few simple props, a pop of color, and letting the natural charm of your nests shine through.
Start by placing the meringue nests on a tiered cake stand or a slate cheese board—bonus points for vintage flair. Want to elevate the vibe? Set them atop a bed of edible flower petals or fresh lemon thyme sprigs for that spring garden aesthetic. No herbs? A dusting of powdered sugar and a few lemon zest curls will make them pop just as well.
Hosting a brunch? Tuck the nests into parchment cupcake liners and place them in a basket lined with linen. For tea parties or showers, serve on mismatched china plates for an eclectic, cottagecore vibe. And if you’re bringing them to a potluck, arrange them in a bakery-style pastry box with a ribbon—instant applause.
Pair these cloud-like treats with citrusy teas, sparkling rosé, or lemonade with floating mint leaves. And don’t forget the final touch: a tiny sprig of mint or edible flower on top of each for that chef’s kiss finish.
Simple, stunning, and guaranteed to have your guests snapping photos before the first bite.
Mix It Up, Maverick!
- Citrus Swap: Lime curd + toasted coconut = tropical vacay. Blood orange curd in winter? Yes, chef!
- Texture Play: Fold ¼ cup toasted coconut into meringue before piping for crunch.
- Chocoholic Fix: Drizzle melted dark chocolate over nests before adding curd.
- Vegan Vibes: Use aquafaba + ¼ tsp xanthan gum. Fill with chia seed lemon “curd.”
- Mini Magic: Make bite-sized nests for bridal showers—pipe 1” circles!
Confessions of a Meringue Addict
True story: I once made 87 nests for a wedding… in a kitchen the size of a broom closet. Let’s just say I now know 17 creative uses for egg yolks. Over the years, I’ve learned:
- Rainy day? Add 10 mins to bake time—humidity is meringue’s nemesis.
- Copper bowls do make fluffier peaks, but your grandma’s stainless steel works too.
- Burnt a batch? Crush them over yogurt—#wastenot!
You Asked, I’m Obsessing Over Answers
Q: Why did my meringues weep/get sticky?
A: Humidity or underbaking! Store in an airtight container with silica packets. If they soften, re-crisp in a 200°F oven for 15 mins.
Q: Can I make these ahead?
A: Bake nests up to 3 days early (keep unfilled in a cookie tin). Fill curd 1-2 hours before serving.
Q: Help! My peaks won’t stiffen!
A: Any yolk or grease in the whites? Even a speck can sabotage. Start over, wash everything with vinegar, and channel your inner zen.
Q: Can I freeze them?
A: Freeze unfilled nests up to 1 month. Thaw at room temp—no microwave!
Nutritional Info (Because Balance, Right?)
Per nest (1/8 recipe): ~120 cal | 2g protein | 1g fat | 25g carbs | 21g sugar
Final Thoughts
Lemon Curd Meringue Nests are more than just a dessert—they’re tiny, tangy love letters to springtime. Every bite brings that perfect balance of crisp and creamy, sweet and tart, rustic and elegant. Whether you’re hosting brunch for ten or treating yourself on a quiet Sunday, these nests deliver drama without the stress.
The beauty of this recipe isn’t just in the flavor—it’s in the experience. From the moment you whip those glossy peaks to the final flourish of edible flowers, you’re crafting something magical. And if your first batch flops? Join the club—kitchen triumphs are often built on a tower of delicious missteps. (We salute the fallen egg whites.)
What makes these meringue nests unforgettable isn’t their perfection—it’s their personality. Lopsided swirls, flecks of toasted coconut, an extra spoonful of lemon curd snuck in before serving… these are the little touches that make each one feel homemade, heartfelt, and totally yours.
So go ahead—pipe, whip, swirl, and smile. Share them with your neighbors. Plate them for tea. Or eat three in your pajamas while binge-watching baking shows (no shame). However you serve them, one thing’s for sure: you just made bite-sized sunshine.