Sharing is caring!
Table of Contents
ToggleIntroduction to High Altitude Baking
Baking at high altitudes brings a thrilling twist to traditional recipes, especially when it comes to creating delectable treats like high altitude banana bread. At elevations above 3,000 feet, the decreased air pressure presents unique challenges and opportunities for bakers. Ingredients behave differently here, where lower atmospheric pressure means faster rising dough and altered boiling points.
This environment demands a special approach to baking classics like banana bread. High altitude banana bread, in particular, becomes a test of skill and adaptability. You must precisely adjust proportions of flour, sugar, and leavening agents to prevent the infamous high-altitude flop. But the rewards are substantial – mastering high altitude baking unlocks a world of fluffy textures and rich flavors that only this unique condition can provide.
In this journey into high altitude banana bread making, we’ll explore the essential adjustments for perfecting this beloved recipe. From tweaking ingredient ratios to modifying baking times, each step is crucial. Whether you’re a seasoned baker or a curious novice, these insights will guide you in conquering the challenges of high altitude baking, ensuring your banana bread rises beautifully and tastes as delightful as it looks. Get ready to elevate your baking skills to new heights, where every loaf of banana bread becomes a testament to your culinary prowess in the face of the thin mountain air.
Key Ingredients for High Altitude Banana Bread
When baking high altitude banana bread, selecting the right ingredients is crucial for a perfect loaf. At higher elevations, the reduced air pressure affects how ingredients behave, making adjustments necessary.
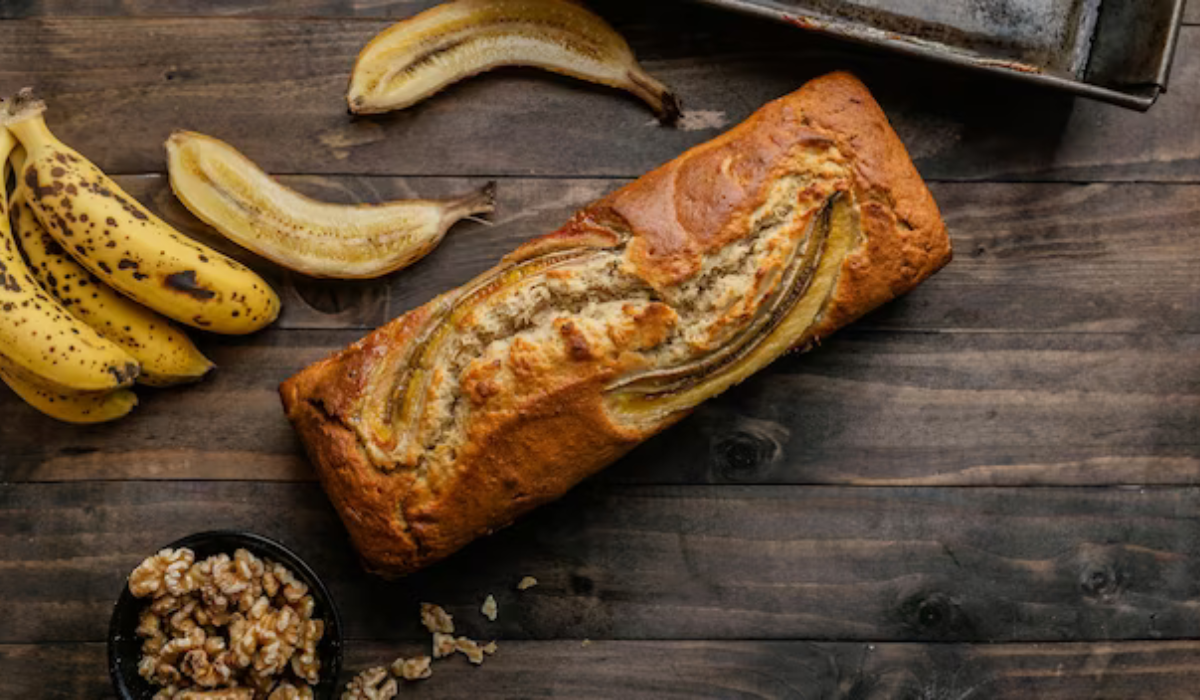
Firstly, the bananas themselves are key. Opt for overly ripe bananas as they offer more sweetness and moisture, essential for counteracting the dryness often experienced at high altitudes. The sugars in ripe bananas also caramelize better, enriching the flavor.
Flour adjustments play a significant role too. You typically need less leavening at higher elevations. So, reduce the amount of baking soda or powder slightly to prevent the bread from rising too quickly and then collapsing. This careful balance ensures that your high altitude banana bread rises just enough to be light and fluffy.
Eggs, a staple in banana bread, require no modification. They add structure and richness, helping to bind the ingredients together. However, you might need to slightly increase the liquid content in the recipe, as liquids evaporate faster at high altitudes. This could mean adding an extra tablespoon or two of milk or water.
Sugar in high altitude baking can be tricky. Too much sugar can weaken the bread’s structure, leading to a dense loaf. Consider reducing the sugar slightly, especially if your bananas are particularly sweet.
Lastly, don’t forget the fat component – butter or oil. These ingredients add moisture and tenderness to your banana bread, which is especially important in the dry, high altitude environment.
By thoughtfully adjusting these key ingredients, your high altitude banana bread will turn out moist, flavorful, and perfectly risen, offering a delightful treat that defies the challenges of high elevation baking.
Recipe Adjustments for High Elevations: Perfecting High Altitude Banana Bread
Baking high altitude banana bread calls for specific adjustments to ensure success. At higher elevations, reduced air pressure significantly impacts how bread rises and sets. Here are the essential changes you need to make:
- Decrease Leavening Agents: Reduce baking powder or soda by 1/4 teaspoon for every teaspoon the recipe calls for. This prevents the bread from rising too quickly and collapsing.
- Increase Liquid: Add 2-4 tablespoons more liquid (milk or water) per cup of flour. This counters the dry air at high altitudes, keeping your banana bread moist.
- Adjust Sugar and Flour: Reduce sugar slightly and increase flour by 1-2 tablespoons per cup. This helps the bread structure and prevents it from being overly sweet.
- Higher Oven Temperature: Increase the baking temperature by 15-25 degrees Fahrenheit. A higher temperature sets the bread structure faster, preventing overexpansion.
- Shorten Baking Time: Start checking your bread about 5-10 minutes earlier than the recipe suggests. High altitude can speed up baking times.
- Mix Gently: Overmixing can incorporate too much air, which can expand excessively at high altitudes. Mix until just combined for the best texture.
By following these adjustments, you’ll create a high altitude banana bread that’s perfectly risen, moist, and delicious. Remember, baking is a science, especially at high altitudes, so these tweaks are crucial for that perfect loaf!
Step-by-Step Banana Bread Recipe at High Altitude
Baking high altitude banana bread requires a keen eye for detail and a few key adjustments to ensure perfection. This guide leads you through each step, making the process straightforward and enjoyable.
- Preheat and Prepare: Start by preheating your oven to 350°F (175°C). Altitude can affect heating, so an oven thermometer helps for accuracy. Grease and flour your loaf pan to prevent sticking.
- Mash Bananas: Take three ripe bananas and mash them in a large bowl. Riper bananas add natural sweetness, perfect for high altitude baking.
- Combine Dry Ingredients: In a separate bowl, sift together 1 ¾ cups of all-purpose flour, ¾ teaspoon of baking soda, and ½ teaspoon of salt. Sifting improves aeration, crucial at high altitudes.
- Mix Wet Ingredients: In your banana bowl, add ⅓ cup melted butter, ½ cup sugar (reduce by 2 tablespoons for altitude), one beaten egg, and 1 teaspoon of vanilla extract. Mix these thoroughly.
- Blend Together: Gradually add your dry ingredients to the wet mixture. Stir until just combined. Overmixing can cause the bread to rise too much and then fall.
- Bake: Pour the batter into your prepared pan. Bake for 50-55 minutes. Check for doneness by inserting a toothpick into the center – it should come out clean.
- Cool and Serve: Let the bread cool in the pan for 10 minutes, then transfer to a wire rack. This cooling step helps in setting the bread’s structure, vital at high altitudes.
Enjoy your high altitude banana bread, a testament to your skill and the unique joy of mountain baking!
Check out these Banana Recipes :
Expert Baking Tips for High Altitudes
Baking high altitude banana bread requires precision and understanding of how elevation changes the game. Here’s how you can master this delightful challenge:
- Reduce Leaveners: At high altitudes, decrease baking powder or soda slightly. This prevents your banana bread from rising too quickly and then collapsing.
- Increase Liquid: Add a bit more liquid than the recipe calls for. The air is drier up high, so your high altitude banana bread needs extra moisture to prevent drying out.
- Adjust Oven Temperature: Bake your banana bread at a slightly higher temperature. This sets the structure before the bread overexpands and loses stability.
- Monitor Sugar and Flour Ratios: Use slightly less sugar and slightly more flour. This helps maintain the right balance and texture in your high altitude banana bread.
- Watch Baking Times: Baking times can be shorter at high altitudes. Start checking your banana bread a few minutes earlier than the recipe suggests.
- Mix Gently: Overmixing can introduce too much air into the batter, which is amplified at high altitudes. Mix just until the ingredients are combined for the perfect texture.
Remember, high altitude baking is part art, part science. Each batch of high altitude banana bread offers an opportunity to refine your skills. Don’t be afraid to experiment with these adjustments to find the perfect balance for your kitchen and altitude. Happy baking!
Common High Altitude Baking Challenges and Solutions
Baking high altitude banana bread presents unique challenges due to the thinner air and lower atmospheric pressure. However, with the right adjustments, you can create a perfectly moist and flavorful loaf every time.
Challenge: Rapid Rising and Falling At high altitudes, leavening agents work too efficiently, causing the bread to rise quickly and then collapse. Solution: Reduce the amount of baking powder or soda. For every teaspoon the recipe calls for, decrease by 1/4 teaspoon.
Challenge: Dry Texture The lower air pressure causes faster evaporation, leading to dry baked goods. Solution: Increase the amount of liquid in the recipe. Add an extra 2-4 tablespoons of liquid (like milk or water) for each cup used.
Challenge: Undercooked Centers The rapid rise often means the outside of the bread cooks faster than the inside. Solution: Lower the baking temperature by 15-25 degrees Fahrenheit and extend the baking time. This slower cooking process allows the center to cook thoroughly without burning the crust.
Challenge: Overly Dense or Heavy Bread Lack of air pressure at high altitudes can prevent the bread from rising sufficiently. Solution: Increase the amount of flour slightly. Add 1-2 tablespoons of flour per cup to provide more structure.
By understanding these challenges and implementing these solutions, your high altitude banana bread will turn out delicious and satisfying. Remember, baking at high altitudes might require a bit of experimentation, but once you find the right balance, your high altitude banana bread will be a testament to your baking skills.
Storing and Serving High Altitude Banana Bread
Storing high altitude banana bread properly ensures it stays fresh and delicious. After baking, let the bread cool completely. This step is crucial to prevent moisture buildup, which can lead to sogginess. Once cool, wrap it tightly in plastic wrap or aluminum foil. For short-term storage, keep the wrapped bread at room temperature for up to three days. For longer storage, freeze the bread. Slice it before freezing for convenience, and store the slices in a freezer-safe bag or container. Properly stored, your high altitude banana bread can last in the freezer for up to three months.
Serving high altitude banana bread is all about enhancing its flavors and textures. If you’ve frozen the bread, thaw it at room temperature or gently warm slices in a microwave or oven. Serve the bread as is, or elevate it with simple additions. A spread of butter or cream cheese complements the bread’s moist texture and rich flavor. For a sweet twist, drizzle honey or maple syrup over warm slices. Pair the bread with a hot cup of coffee or tea for a comforting snack or a quick, satisfying breakfast. Remember, the key to perfect high altitude banana bread lies in both the baking and the serving. With these tips, your high altitude banana bread will be a delightful treat every time.
Nutritional Insights and Health Benefits of High Altitude Banana Bread
Baking high altitude banana bread not only delights your taste buds but also packs a nutritional punch. The key ingredient, bananas, is a powerhouse of essential vitamins and minerals. They provide a significant dose of potassium, vital for heart health, and are rich in Vitamin B6, aiding metabolism and brain function.
Whole wheat flour, often used in high altitude adjustments, increases the bread’s fiber content. This boost in fiber aids digestion and promotes a feeling of fullness, contributing to weight management. The use of reduced sugar in high altitude recipes also cuts down on unnecessary calories, making the bread a healthier choice.
Eggs, a common binder in banana bread, offer high-quality protein and essential amino acids, supporting muscle health and repair. When it comes to fats, opting for heart-healthy options like olive oil or unsaturated fats can enhance the nutritional profile of your high altitude banana bread.
The altitude’s effect on baking creates a lighter, airier texture, which often means you consume less density in each slice compared to its sea-level counterpart. This subtly reduces calorie intake without compromising on taste or satisfaction.
In summary, high altitude banana bread is not just a culinary delight but a nutritious treat too. Its balanced composition of vitamins, minerals, fiber, and proteins makes it a wholesome addition to any diet, proving that indulging in your baking passion can be both delicious and healthy.
FAQs on High Altitude Banana Bread Baking
- How does high altitude affect banana bread baking? At high altitudes, reduced air pressure causes faster rising, which can affect the texture and structure of your high altitude banana bread. Adjustments in leavening agents and oven temperature are essential to compensate.
- What changes should I make to my banana bread recipe at high altitude? For high altitude banana bread, decrease the amount of baking powder or soda, slightly increase oven temperature, and consider adding a bit more flour to stabilize the structure.
- Why is my high altitude banana bread dry? The lower air pressure at high altitudes causes faster evaporation of moisture. To prevent dryness, increase the amount of liquid in your recipe slightly.
- Can I use regular banana bread recipes for high altitude baking? Yes, but with modifications. Adjust leavening agents, liquids, and baking temperature as per high altitude baking guidelines to ensure your banana bread turns out moist and fluffy.
- How long should I bake banana bread at high altitude? Baking times may be shorter at high altitude due to increased oven temperatures. Start checking your banana bread a few minutes earlier than the recipe suggests.
- What’s the best way to store high altitude banana bread? Store it in an airtight container at room temperature. If you’re in a very dry climate, wrapping the bread in a moist cloth before placing it in the container can help retain moisture.
By understanding these high altitude banana bread specifics, you can confidently bake delicious, perfectly-textured bread that rises beautifully and satisfies every palate.
Conclusion: High Altitude Banana Bread – A Rewarding Culinary Adventure
Embarking on the journey of baking high altitude banana bread is more than just a culinary endeavor; it’s an exploration into the art and science of baking. As we’ve navigated through the nuances of ingredient adjustments and tackled the challenges unique to higher elevations, the reward has been clear: a loaf of banana bread that’s not only delicious but also a testament to your baking skills and adaptability.
This guide has aimed to demystify the often-intimidating process of high altitude baking. By embracing these specialized techniques and understanding the importance of each ingredient and its role at higher elevations, you’re now equipped to bake banana bread that rises beautifully and tastes divine, regardless of your altitude.
Remember, the key to perfect high altitude banana bread lies in the balance of moisture, the right blend of leavening agents, and the patience to experiment. Each oven, each batch of ingredients, and every altitude brings a unique twist to the recipe, making your baking experience truly personal and rewarding.
So, preheat your oven, gather your ingredients, and embark on this high altitude baking adventure with confidence and excitement. Whether you’re a seasoned baker or a novice, the journey to mastering high altitude banana bread promises not just a delicious treat, but a newfound appreciation for the art of baking above the clouds.


