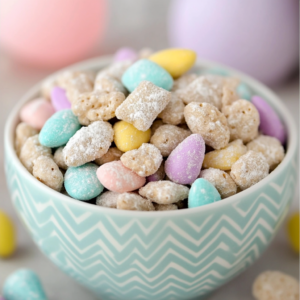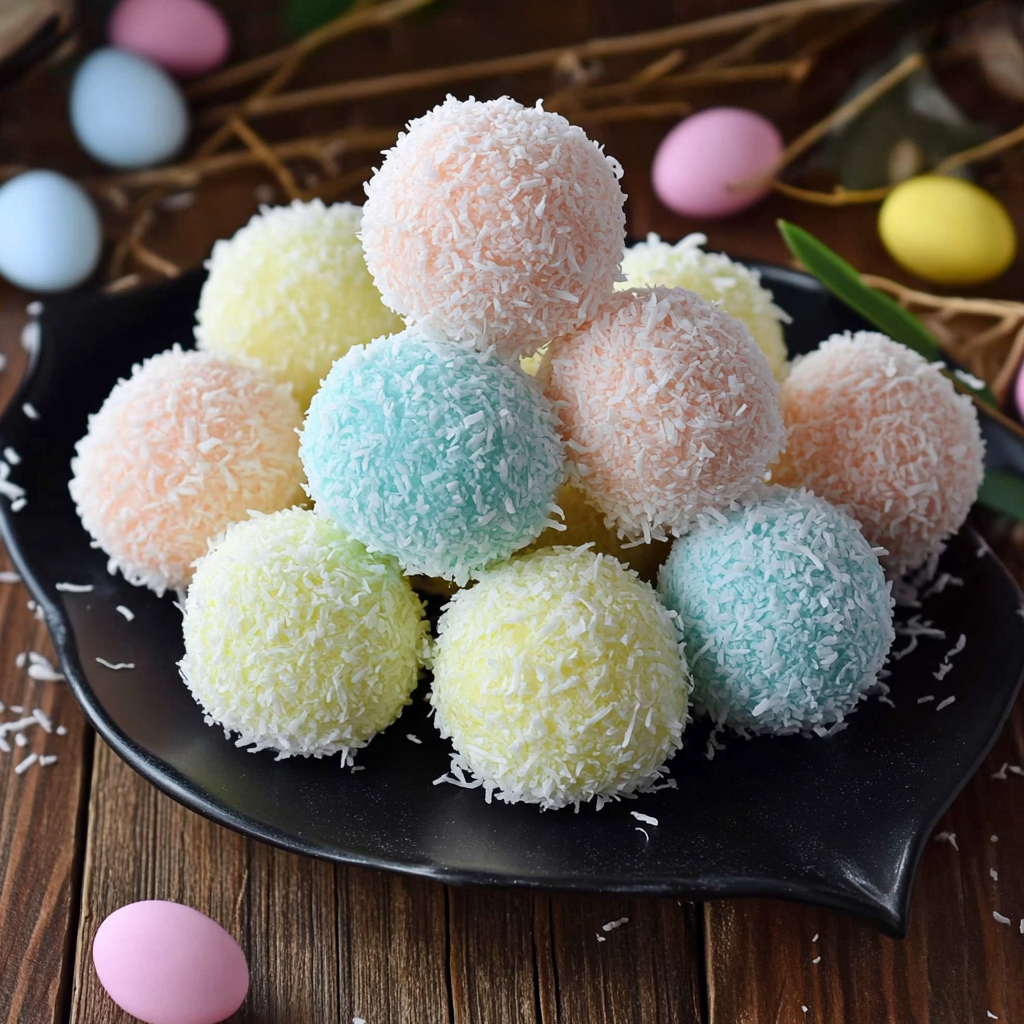

Easter is the perfect time to indulge in sweet treats, and these Easter Bunny Coconut Tails are as delightful to make as they are to eat! These bite-sized coconut confections are no-bake, easy to prepare, and perfect for kids to get involved in the kitchen. With their pastel-colored coconut coating, they are a beautiful addition to any Easter celebration.
In this post, we’ll go through everything you need to know about making Easter Bunny Coconut Tails, from ingredients and step-by-step instructions to customization ideas, storage tips, and more. Let’s get started!
Why You’ll Love This Recipe
- No-Bake Convenience: No need to turn on the oven—just mix, roll, and refrigerate!
- Kid-Friendly: Kids will have so much fun coloring the coconut and rolling the balls.
- Perfect for Easter: These pastel-colored coconut treats are festive and fun.
- Make-Ahead Friendly: You can prepare them in advance, making Easter prep easier.
- Simple Ingredients: Requires only a handful of ingredients, many of which you may already have!
Ingredients You’ll Need
To make these Easter Bunny Coconut Tails, you will need:
- 5 cups unsweetened coconut (medium shred) – This forms the bulk of the mixture.
- 2 cups unsweetened coconut (fine shred) – Used to coat the treats with beautiful pastel colors.
- 14 ounces sweetened condensed milk – Adds sweetness and binds the mixture together.
- 2 tablespoons butter (melted and cooled) – Gives the mixture a richer texture.
- 1 teaspoon vanilla extract – Enhances the flavor.
- 1/4 cup confectioner’s sugar – Provides additional sweetness.
- Liquid food coloring – Used to dye the coconut in pastel shades.
📌 Tip: If you prefer sweeter treats, you can use sweetened shredded coconut instead of unsweetened.
Step-by-Step Instructions
Step 1: Prepare the Mixture
In a large mixing bowl, whisk together the sweetened condensed milk, melted butter, and vanilla extract until fully combined. This creates the perfect sticky base to hold the coconut together.
Step 2: Add the Coconut and Sugar
Add the 5 cups of medium shredded coconut and confectioner’s sugar to the bowl. Stir well until the mixture is evenly combined. The batter should be thick and slightly sticky.
Step 3: Chill the Mixture
Refrigerate the mixture for 15 minutes to allow it to firm up. This makes it easier to roll into balls later.
Step 4: Color the Coconut
Divide the 2 cups of fine shredded coconut into separate bowls, depending on how many colors you want to use. Add 3-4 drops of food coloring to each bowl and use a hand-held mixer to mix until the coconut is evenly colored. Repeat for each color (e.g., blue, yellow, green, pink).
📌 Tip: If the coconut isn’t coloring evenly, add a tiny bit of water to help distribute the color.
Step 5: Shape the Balls
Once the mixture is chilled, use a small cookie scoop or a measuring spoon to portion out 1 ½ teaspoon-sized balls. Roll them between your palms until smooth.
Step 6: Coat in Colored Coconut
Roll each ball into the colored coconut of your choice, ensuring they are fully coated. Place them on a parchment-lined baking sheet.
Step 7: Set the Coconut Tails
Refrigerate the rolled coconut tails for one hour to allow them to set and firm up.
Step 8: Serve & Enjoy!
Keep the coconut tails chilled until ready to serve. Remove them from the fridge a few minutes before serving so they are the perfect texture.
How to Store Easter Bunny Coconut Tails
These treats store well, making them perfect for preparing ahead of time!
- In the Refrigerator: Store in an airtight container for up to one week.
- In the Freezer: Freeze in a freezer-safe container for up to three months. Let them thaw for 10-15 minutes before serving.
📌 Tip: Layer them with parchment paper in between to prevent sticking.
Creative Variations & Add-Ons
Want to take your Easter Bunny Coconut Tails to the next level? Try these fun variations:
Chocolate-Dipped Coconut Tails
- Dip the finished coconut tails in melted white or dark chocolate and let them set before serving.
Flavored Coconut Tails
- Add a few drops of almond extract, coconut extract, or lemon zest for a flavor boost.
Sprinkle Fun
- Instead of colored coconut, roll the balls in Easter-themed sprinkles for extra fun!
Nutty Delight
- Mix in some crushed almonds, pecans, or walnuts for added crunch.
Frequently Asked Questions (FAQ)
1. Can I use sweetened coconut instead of unsweetened?
Yes! If you prefer a sweeter treat, feel free to use sweetened coconut, but you may want to reduce the added confectioner’s sugar slightly.
2. Can I make these ahead of time?
Absolutely! These can be made up to a week in advance if stored in the fridge, or frozen for up to three months.
3. What’s the best way to color the coconut?
Liquid food coloring works best for even distribution. If using gel food coloring, dilute it with a small amount of water before mixing.
4. Can I make these dairy-free?
Yes! Use dairy-free sweetened condensed milk and plant-based butter to make a vegan version.
🐰 Easter Bunny Coconut Tails – A Sweet No-Bake Treat! 🥥✨
Description
These adorable Easter Bunny Coconut Tails are as fun to make as they are to eat! 🩷💛💙 A perfect no-bake recipe for little hands, they’re soft, chewy, and coated in beautiful pastel coconut flakes. A sweet way to add a festive touch to your Easter celebrations! 🌸🐣
Ingredients
✔ 5 cups unsweetened coconut (medium shred)
✔ 2 cups unsweetened coconut (fine shred)
✔ 14 oz sweetened condensed milk
✔ 2 tbsp butter, melted & cooled
✔ 1 tsp vanilla extract
✔ ¼ cup confectioner’s sugar
✔ Liquid food coloring (for pastel magic!)
Instructions
1️⃣ In a large bowl, whisk condensed milk, melted butter & vanilla.
2️⃣ Stir in medium-shred coconut & confectioner’s sugar. Chill for 15 min.
3️⃣ Meanwhile, color the fine-shred coconut: Mix ½ cup with 3-4 drops of food coloring and blend until evenly colored. Repeat for each color.
4️⃣ Scoop chilled mixture into 1½ teaspoon portions, roll into balls, then coat in colored coconut.
5️⃣ Place on a baking sheet and chill for 1 hour to set.
6️⃣ Keep refrigerated until serving. Enjoy these sweet little bites! 🐣💖
Notes
Make extra—they disappear fast!
Final Thoughts
Easter Bunny Coconut Tails are the ultimate no-bake Easter treat—fun, colorful, and delicious! With their sweet coconut flavor, pastel hues, and easy preparation, they are perfect for any Easter celebration.
Whether you’re making them with kids, gifting them to friends and family, or enjoying them as a festive dessert, these coconut treats are sure to impress. Give them a try and bring a little Easter magic to your holiday table!