
Sharing is caring!
Table of Contents
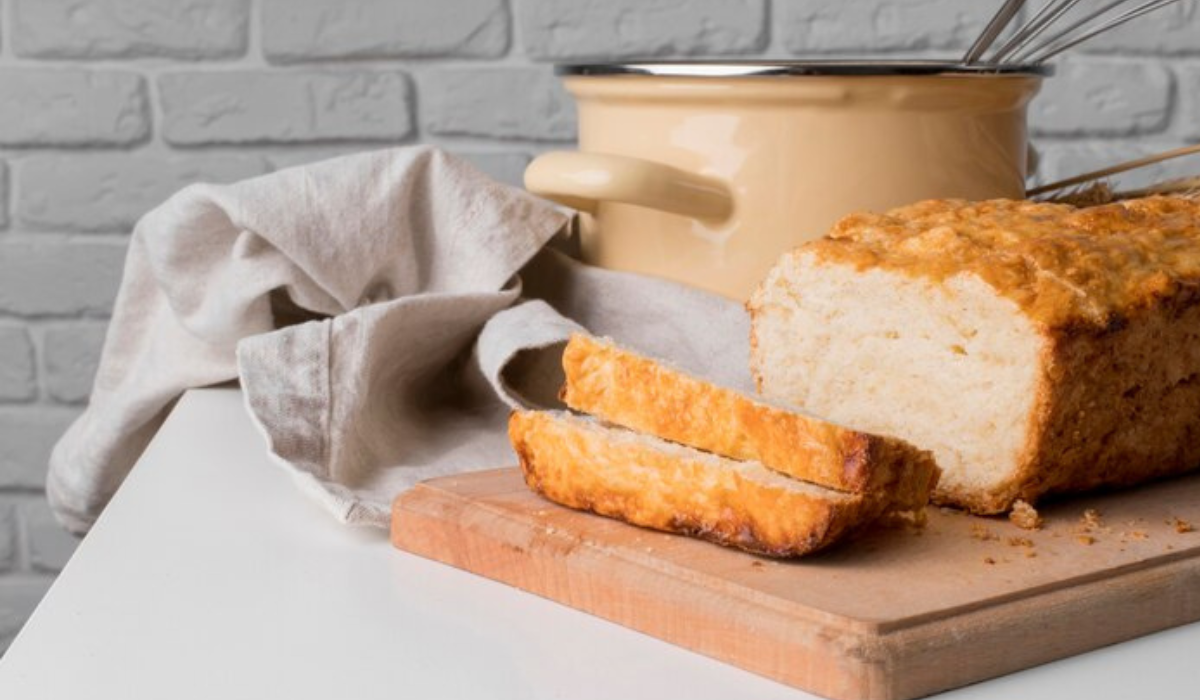
ToggleEmbracing the Art of Buttermilk Bread Recipe: A Journey Begins
Welcome to the delightful world of homemade bread baking, where the buttermilk bread recipe takes center stage. This journey invites you to delve into the art of creating a loaf that’s not just nourishing but also a testament to the joys of baking. Buttermilk bread, with its unique tang and tender crumb, offers a heartwarming experience for both novice and seasoned bakers.
Imagine the aroma of freshly baked bread filling your kitchen, the crust golden and inviting, the inside perfectly soft and flavorful. That’s the magic of a well-crafted buttermilk bread recipe. In this introduction, we’re going to explore the basics of what makes buttermilk bread so special.
This bread stands out for its subtle tang and tender texture, owing to the star ingredient – buttermilk. This slightly acidic dairy product not only enhances the bread’s flavor but also tenderizes the gluten, giving you a loaf that’s soft yet structured.
Embarking on this buttermilk bread recipe journey, we’ll cover everything from selecting the right ingredients to mastering the kneading and baking techniques. Whether you’re looking to create a comforting loaf for your family or eager to impress friends at a gathering, mastering this recipe will set you on a path to becoming an adept home baker.
Get ready to don your apron, dust off your hands with flour, and immerse yourself in the fulfilling process of baking buttermilk bread. It’s not just about following a recipe; it’s about embracing a tradition, honing a skill, and indulging in the simple pleasures of life. So, let’s begin our journey with the buttermilk bread recipe, a journey filled with learning, excitement, and the promise of delicious results.
Unveiling Buttermilk: The Heart of Your Buttermilk Bread Recipe
Buttermilk, the heart of your buttermilk bread recipe, is more than just a liquid ingredient; it’s a magical element that transforms your bread. So, what exactly is buttermilk? Traditionally, it was the liquid left behind after churning butter out of cream. However, the buttermilk we commonly use in recipes today is a cultured product. It’s made by adding beneficial bacteria to milk, which ferments the lactose, turning it into lactic acid. This process imparts buttermilk with its characteristic tangy flavor and creamy texture.
Why does buttermilk play such a pivotal role in a buttermilk bread recipe? The answer lies in its unique properties. The acidity of buttermilk not only contributes a delightful tang to the bread but also acts as a tenderizer. In baking, this means softer, more tender crumbs and a bread that melts in your mouth. Buttermilk’s acidity also reacts with baking soda, creating a leavening effect that results in a lighter, fluffier texture.
Including buttermilk in your bread recipe does more than improve texture and taste; it also adds a nutritional boost. Buttermilk is rich in essential nutrients like calcium, vitamin B12, potassium, and phosphorus, making your bread not just delicious but also nutritious.
Understanding the role of buttermilk is key to mastering your buttermilk bread recipe. It’s not just an ingredient; it’s a bridge that connects taste, texture, and nutrition, elevating your bread from good to great. So, the next time you pour buttermilk into your dough, remember, you’re adding a touch of magic that’s been cherished in baking traditions for centuries.
Crafting Perfection: Key Ingredients in Your Buttermilk Bread Recipe
Creating the perfect loaf of buttermilk bread starts with understanding and gathering the right ingredients. Each component plays a vital role in the final texture, taste, and appearance of your bread. Let’s dive into the essentials that make your buttermilk bread recipe a success.
- Buttermilk: The star of the show, buttermilk, brings acidity, moisture, and a tender crumb to your bread. Its unique properties help in rising and flavor enhancement, setting the foundation for a delicious loaf.
- Flour: The backbone of your bread, flour, provides structure. For buttermilk bread, a mix of bread flour and all-purpose flour often works best. Bread flour gives a chewier texture due to higher protein content, while all-purpose flour keeps it light.
- Yeast: Yeast is the leavening agent that makes your bread rise. For buttermilk bread, active dry yeast or instant yeast are commonly used. They help in fermentation, giving your bread the perfect rise and a soft, airy texture.
- Sugar: A touch of sugar not only sweetens your bread but also feeds the yeast, aiding in fermentation and browning of the crust.
- Salt: Salt is crucial for flavor balance. It controls yeast activity and strengthens the gluten network, ensuring your bread doesn’t become too dense or too fluffy.
- Fat: Butter or oil in your buttermilk bread recipe enhances flavor, softens the texture, and extends shelf life. It adds a rich, moist quality to the bread.
- Optional Add-ins: Seeds, nuts, or herbs can be added for extra flavor and texture.
Understanding the role of each ingredient helps you craft a buttermilk bread recipe that’s not just good, but exceptional. The right balance of these components will yield a loaf that’s flavorful, with a delightful texture and aroma that beckons from the oven. Get ready to mix, knead, and bake your way to buttermilk bread perfection
Mastering the Art of the Perfect Buttermilk Bread Recipe
Creating the perfect loaf of buttermilk bread is an art that combines simplicity with a touch of culinary magic. Here’s a recipe that balances traditional techniques with easy-to-follow steps, ensuring your buttermilk bread is not just good, but exceptional.
Ingredients:
- 4 cups all-purpose flour (plus extra for dusting)
- 1 packet (2 1/4 teaspoons) active dry yeast
- 1 1/2 cups buttermilk, lukewarm
- 1/4 cup warm water
- 2 tablespoons unsalted butter, melted
- 2 tablespoons sugar
- 1 1/2 teaspoons salt
Instructions:
- Activate the Yeast: In a small bowl, mix the warm water, sugar, and yeast. Let it sit for 5-10 minutes until it becomes frothy, signaling the yeast is active.
- Combine Dry Ingredients: In a large mixing bowl, whisk together the flour and salt.
- Mix the Wet Ingredients: Add the lukewarm buttermilk and melted butter to the yeast mixture, stirring to combine.
- Form the Dough: Gradually add the wet ingredients to the flour mixture, stirring until a dough forms. If the dough is too sticky, add a little more flour.
- Knead the Dough: Turn the dough onto a floured surface and knead for about 8-10 minutes until it’s smooth and elastic.
- First Rise: Place the dough in a greased bowl, cover with a clean cloth, and let it rise in a warm place for about 1 hour, or until it doubles in size.
- Shape the Bread: Punch down the dough, shape it into a loaf, and place it in a greased loaf pan.
- Second Rise: Cover the loaf pan and allow the dough to rise for another 30 minutes.
- Preheat and Bake: Preheat your oven to 375°F (190°C). Bake the bread for 25-30 minutes, or until the top is golden brown and the loaf sounds hollow when tapped.
- Cool and Serve: Remove the bread from the oven and let it cool in the pan for 10 minutes. Then transfer to a wire rack to cool completely.
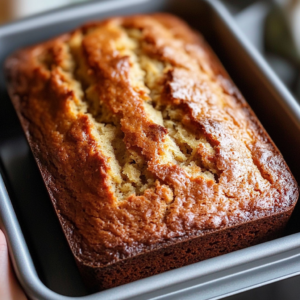
This buttermilk bread recipe yields a loaf with a soft, tender crumb and a beautifully golden crust. It’s perfect for slicing and serving with your favorite spreads, or simply enjoying as is. The aroma of freshly baked bread, combined with the satisfaction of creating it from scratch, makes this buttermilk bread recipe a rewarding baking adventure. Enjoy the process, and relish the delicious results!
Perfecting Your Buttermilk Bread Recipe: Kneading Techniques Decoded
Kneading is a crucial step in perfecting your buttermilk bread recipe. It’s the process that develops the gluten in your dough, giving your bread the ideal texture and structure. Whether you’re a beginner or a seasoned baker, understanding the right kneading technique can take your buttermilk bread from good to great.
- Start with a Clean Surface: Before you begin, ensure your kneading surface is clean and lightly floured. This prevents the dough from sticking and makes kneading easier.
- The Initial Fold: Begin by folding the dough onto itself. Use the heels of your hands to push the dough away, then fold it back toward you. Rotate the dough 90 degrees and repeat. This folding action starts to align the gluten strands, crucial for your buttermilk bread’s structure.
- Rhythmic Kneading: Establish a rhythmic motion – push, fold, turn. Apply firm, consistent pressure with the heels of your hands. The dough should start feeling smoother and less sticky as you continue.
- Checking Dough Consistency: Your buttermilk bread dough is well-kneaded when it’s smooth, elastic, and no longer sticky. It should spring back when poked. If it’s still sticky, sprinkle a bit more flour and continue kneading.
- Rest the Dough: After kneading, let the dough rest. This allows the gluten to relax and makes the bread easier to shape.
- Hand Kneading vs. Machine: While hand kneading adds a personal touch to your buttermilk bread recipe, using a stand mixer with a dough hook is a time-saving alternative. If using a machine, mix on a low setting for about 7-10 minutes.
Remember, kneading is not just a step in your recipe; it’s an opportunity to connect with your baking. Feel the dough change under your hands, and take pride in the process. By mastering these kneading techniques, you’re well on your way to baking a perfect loaf of buttermilk bread, one that’s deliciously soft and delightfully structured.
Mastering Fermentation and Proofing in Your Buttermilk Bread Recipe
Fermentation and proofing are key to unlocking the full potential of your buttermilk bread recipe. These stages are where patience and attention to detail can transform your dough into a flavorful, well-textured loaf.
- Fermentation Begins: After kneading, the first fermentation, or bulk rise, starts. Place your dough in a lightly greased bowl, cover it, and let it sit in a warm, draft-free area. This stage allows the yeast to work, fermenting the sugars in the flour and producing carbon dioxide. This process, lasting about one to two hours, not only makes the dough rise but also enhances the flavor of your buttermilk bread.
- Check the Dough’s Rise: You’ll know fermentation is done when the dough has doubled and leaves a slow-rebounding indentation when poked.
- Shaping for Second Proofing: Post-fermentation, shape your dough as desired. The second proofing, which is shorter, around 30-45 minutes, readies the bread for baking. This proofing stage is crucial for the final texture.
- Creating the Perfect Proofing Environment: A warm, moist spot works best for proofing. A pro tip is to use a turned-off oven with a pan of hot water underneath, creating a steamy environment conducive to rising.
- Ready for the Oven: When the dough has nearly doubled in size and feels light, it’s ready to bake. A slight indentation should remain when gently pressed.
Fermentation and proofing might test your patience, but they are vital in crafting a superb loaf of buttermilk bread. These stages ensure that your bread comes out light, airy, and bursting with flavor – a true testament to your baking skills.
Crafting Artistry in Your Buttermilk Bread Recipe: Shaping and Scoring
Transforming your buttermilk bread dough into a bakery-worthy loaf involves two key steps: shaping and scoring. These techniques not only enhance your bread’s appearance but also its texture and baking quality.
Shaping the Dough:
After the first rise, deflate your dough gently and move it to a floured surface. For a loaf, shape it into a rectangle, fold the sides into the center, and roll it into a cylinder. Seal the seam and place it seam-side down in your loaf pan. This step ensures even baking and gives your bread a professional, uniform shape.
Proofing After Shaping:
Let your shaped dough proof until it nearly doubles. This stage is essential for achieving a light, airy texture in your baked bread.
Scoring the Dough:
Just before baking, score your bread. This means making shallow cuts on the surface with a sharp knife or bread lame. For a standard loaf, a single, lengthwise slash is effective. These cuts should be about a quarter-inch deep.
The Purpose of Scoring:
Scoring controls the bread’s expansion in the oven, preventing it from bursting at random spots and ensuring an even shape. It’s a blend of art and function, adding visual appeal while influencing the bread’s texture and crust.
Mastering shaping and scoring in your buttermilk bread recipe is not just about following steps; it’s about applying your personal touch to each loaf. These processes highlight your skill and creativity, turning a simple piece of dough into an artistic and delicious creation. With each slash and shape, you’re not just baking bread; you’re crafting a masterpiece.
Baking Mastery: Bringing Your Buttermilk Bread Recipe to Life
Baking your buttermilk bread is where all your preparation and patience come to fruition. It’s the final and most rewarding step in your buttermilk bread recipe. Follow these tips to ensure your loaf turns out perfectly golden and delicious.
- Preheat Your Oven: Start by preheating your oven to 375°F (190°C). A properly heated oven is crucial for even baking and achieving that beautiful crust.
- Positioning the Dough: Place your scored dough into the oven. If you’re using a loaf pan, center it on the middle rack to allow for even air circulation.
- Creating Steam for a Crispy Crust: For a crispier crust, introduce steam by placing a tray of water at the bottom of the oven or spraying the oven walls with water just before closing the door. This steam helps in forming a golden, crackly crust.
- Baking Time: Bake your bread for about 25-30 minutes. The exact time can vary depending on your oven and the size of your loaf. You’re aiming for a deep golden brown color.
- Testing for Doneness: To check if your bread is done, tap the bottom of the loaf. If it sounds hollow, it’s ready. Another method is to use a digital thermometer; your bread should reach an internal temperature of about 190-200°F (88-93°C).
- Cooling Your Bread: Once baked, remove the bread from the oven and let it cool in the pan for about 10 minutes. Then, transfer it to a wire rack to cool completely. This cooling process allows the bread’s structure to set and makes slicing easier.
Baking your buttermilk bread is an exhilarating experience. As you open the oven to a perfectly baked loaf, all the mixing, kneading, and waiting becomes worth it.
Exploring Creative Variations of Your Buttermilk Bread Recipe
Experimenting with different variations can add exciting twists to your classic buttermilk bread recipe. Whether you’re looking for something sweeter, heartier, or with a unique flavor, these ideas will inspire you to customize your bread.
- Adding Nuts and Seeds: For a crunchy texture and extra nutrition, mix in nuts like walnuts or almonds, or seeds such as sunflower or pumpkin seeds. Add them during the final stages of kneading to distribute them evenly throughout the dough.
- Sweeten the Deal: Transform your buttermilk bread recipe into a sweet treat by incorporating ingredients like cinnamon, raisins, or dried cranberries. A swirl of brown sugar and cinnamon, added just before shaping the dough, can turn your loaf into a delightful cinnamon bread.
- Herbs and Spices: Fresh or dried herbs like rosemary, thyme, or basil can infuse your bread with aromatic flavors. For a bolder taste, spices like cumin or fennel seeds can be a great addition.
- Cheese Please: Cheese can add a deliciously savory twist to your buttermilk bread. Fold in grated cheese like cheddar or Parmesan during kneading for a delightful cheesy flavor.
- Whole Grain Variation: For a heartier, more nutritious loaf, replace some of the all-purpose flour with whole wheat flour. You can also add rolled oats or bran for additional texture and fiber.
- Vegan Adaptation: To make a vegan version of your buttermilk bread recipe, substitute the buttermilk with a plant-based version made from almond or soy milk mixed with a tablespoon of vinegar or lemon juice.
- Gluten-Free Option: For a gluten-free version, use a blend of gluten-free flours and add xanthan gum to help with the texture and structure of the bread.
Experimenting with these variations can transform your standard buttermilk bread recipe into something uniquely yours.
Serving and Pairing Ideas for Your Buttermilk Bread
Once you’ve mastered your buttermilk bread recipe, the next exciting step is to explore various serving and pairing ideas. Buttermilk bread, with its soft texture and slightly tangy flavor, pairs wonderfully with a variety of foods and can be enjoyed in many different ways. Here are some delightful ideas to enhance your dining experience with homemade buttermilk bread.
- Classic Breakfast: Start your day with a slice of buttermilk bread toasted to golden perfection. Spread it with butter, jam, or honey for a simple yet satisfying breakfast.
- Hearty Sandwiches: Utilize the sturdy yet soft texture of buttermilk bread to make delicious sandwiches. It pairs well with both cold cuts and grilled fillings like chicken, cheese, and vegetables.
- Soup Companion: Serve your buttermilk bread alongside a warm bowl of soup. Its absorbency makes it perfect for dipping into creamy or broth-based soups.
- Cheese Platter: Complement a cheese platter with slices of buttermilk bread. Its mild flavor pairs well with a variety of cheeses, from sharp cheddar to soft brie.
- Savory Spreads: Top buttermilk bread with savory spreads like hummus, tapenade, or pesto for a quick and tasty appetizer.
- French Toast: Transform your buttermilk bread into a delectable French toast. The bread’s texture soaks up the egg mixture beautifully, creating a deliciously rich breakfast treat.
- Bruschetta Base: Use it as the base for bruschetta, topping it with a mixture of tomatoes, basil, garlic, olive oil, and balsamic vinegar for a fresh and flavorful appetizer.
- Dessert Delight: Create a sweet dessert by serving your buttermilk bread with a spread of Nutella, a sprinkle of powdered sugar, or alongside your favorite ice cream.
These serving and pairing ideas showcase the versatility of buttermilk bread, making it a fantastic addition to any meal, from a hearty breakfast to a light snack or an elegant appetizer. Enjoy experimenting with these ideas and discover the many ways you can savor your homemade buttermilk bread.
Storing and Freezing Tips for Your Buttermilk Bread
Preserving the freshness of your homemade buttermilk bread is essential for enjoying it long after baking. Proper storage and freezing techniques can significantly extend the life of your bread while maintaining its taste and texture. Here are some tips to help you store and freeze your buttermilk bread effectively.
Cooling Before Storage:
Always allow your buttermilk bread to cool completely before storing. Storing it while still warm can lead to moisture buildup, making the bread soggy or moldy.
Room Temperature Storage:
For short-term storage, keep the bread in a bread box or a paper bag at room temperature. This helps retain its crust’s crispness while keeping the inside soft. Avoid plastic bags which can make the crust soft.
Refrigeration is Not Ideal:
While refrigerating bread can prevent mold, it also accelerates staling. Store your bread at room temperature unless you live in a very humid climate where mold is a concern.
Freezing for Longevity:
For long-term storage, freezing is the best option. Slice your bread if you prefer to use it one piece at a time. Wrap the loaf or slices in plastic wrap and then in foil to protect it from freezer burn and flavor absorption from other foods.
Thawing Frozen Bread:
To thaw, leave the bread at room temperature in its wrapping to avoid condensation, which can make the bread soggy. For a quicker method, you can also toast slices directly from the freezer.
Refreshing Your Bread:
If your bread feels a bit stale, you can refresh it in the oven. Sprinkle the loaf with water and heat it in a 350°F (175°C) oven for about 10 minutes. This can help restore some of the bread’s original texture and crispness.
By following these storage and freezing tips, you can enjoy your homemade buttermilk bread for longer periods, ensuring that none of your baking efforts go to waste. Whether you’re savoring it the next day or a month later, these methods will help keep your bread tasting as fresh as the day it was baked.
Adapting Your Buttermilk Bread Recipe for Special Diets
Creating a buttermilk bread recipe that caters to special dietary needs allows everyone to enjoy this delightful treat. Whether you’re baking for gluten-free, vegan, or low-sugar diets, with a few adjustments, your buttermilk bread can be just as delicious and satisfying.
Gluten-Free Buttermilk Bread:
Replace traditional wheat flour with a gluten-free flour blend. Look for a mix that includes xanthan gum, which mimics gluten’s binding properties. Adjust the liquid content as gluten-free flour blends tend to absorb more moisture.
Vegan Buttermilk Bread:
To make your buttermilk bread vegan, substitute dairy buttermilk with a plant-based version. Mix almond, soy, or oat milk with a tablespoon of lemon juice or apple cider vinegar to replicate the tanginess of buttermilk. Use vegan butter or oil as a substitute for regular butter.
Low-Sugar Buttermilk Bread:
If you’re cutting down on sugar, reduce the amount used in your recipe or opt for a natural sweetener like stevia. Keep in mind that yeast requires some sugar to activate, so don’t eliminate it entirely.
Dairy-Free Options:
For those who are dairy intolerant, apart from using vegan buttermilk, choose dairy-free butter alternatives or even olive oil to add richness to your bread.
Whole Grain Variants:
Incorporate whole wheat flour for a healthier version. Whole grains add fiber and nutrients. You might need to increase the buttermilk quantity slightly as whole wheat flour is more absorbent.
Adding Nutritional Boosts:
Enhance your buttermilk bread with nutrient-dense ingredients like flaxseed, chia seeds, or nuts for additional health benefits.
Adapting your buttermilk bread recipe to suit various dietary requirements doesn’t mean sacrificing flavor or texture. With these modifications, you can bake a loaf that’s not only inclusive but also incredibly tasty. Enjoy experimenting and sharing your buttermilk bread, knowing it can be enjoyed by all, regardless of their dietary needs.
Bread Making as a Family Activity: Bonding Over Buttermilk Bread
Transforming your buttermilk bread recipe into a family activity is a wonderful way to bond and create lasting memories. Bread making is not just about the delicious outcome; it’s a journey of collaboration, learning, and fun that can be enjoyed by family members of all ages. Here’s how to turn bread making into an engaging family affair.
- Assign Roles: Depending on their age and skill level, assign roles to each family member. Someone can measure ingredients, another can mix, and older children or adults can handle kneading and oven duties. This teaches responsibility and teamwork.
- Educational Opportunity: Use the buttermilk bread recipe to teach children about measurements, chemistry in cooking, and the importance of following instructions. It’s a practical and tasty way to learn.
- Storytelling and Heritage: Share stories about family recipes, or discuss the origin of buttermilk bread. This can be a great way to connect children with their heritage and family traditions.
- Creative Customization: Let each family member choose an ingredient to add, like seeds, nuts, or dried fruits. This encourages creativity and makes each loaf unique.
- Decorating the Bread: Post-baking, have a bread-decorating session. Use edible paints or natural ingredients like beet juice for coloring to make the activity more artistic and enjoyable.
- Enjoying Together: The best part of bread making is enjoying the fruits of your labor. Savor your buttermilk bread together, perhaps with a special spread or homemade soup. It’s a rewarding way to end the activity.
Making buttermilk bread as a family not only results in a delicious loaf but also fosters a sense of accomplishment. It teaches valuable skills, strengthens bonds, and creates joyful memories. So, gather your ingredients, roll up your sleeves, and get ready for a delightful baking adventure with your loved ones.
Exploring Advanced Buttermilk Bread Recipes: Elevate Your Baking Skills
Once you’ve mastered the basic buttermilk bread recipe, it’s time to explore more advanced variations that can challenge and refine your baking skills. These advanced recipes introduce new ingredients, techniques, and flavors, turning your ordinary loaf into a gourmet masterpiece. Here are some ideas to inspire your next baking adventure.
Buttermilk Sourdough Bread:
Combine the tangy flavors of buttermilk and sourdough. Start with a sourdough starter and incorporate buttermilk for a richer taste and softer crumb. This recipe requires patience and precision in fermentation and temperature control.
Multigrain Buttermilk Bread:
Enhance your bread with a variety of grains like barley, oats, and rye. This not only adds complex flavors and textures but also boosts the nutritional value. Getting the right balance of grains and maintaining a good rise are the keys to success.
Buttermilk Brioche:
Elevate your bread with a luxurious twist by making a buttermilk brioche. Rich with butter and eggs, and enhanced with buttermilk, this bread is soft, fluffy, and indulgent. Perfecting the light, tender crumb of brioche requires skillful kneading and proofing.
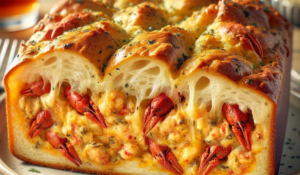
Stuffed Buttermilk Loaf:
Experiment by stuffing your loaf with ingredients like cheese, garlic, herbs, or sun-dried tomatoes. This involves skillful dough shaping and an understanding of how fillings affect baking time and dough expansion.
Buttermilk Bread with Poolish:
Incorporate a poolish (a type of pre-ferment) into your buttermilk bread to develop deeper flavors and a better crust. Managing this additional fermentation stage adds complexity to the bread-making process.
Spiced Buttermilk Bread:
Add spices like cinnamon, nutmeg, or cardamom to create a warm, aromatic loaf, perfect for holidays or special occasions. Balancing spices with the tang of buttermilk is an art in itself.
These advanced buttermilk bread recipes offer a delightful challenge for those looking to push their baking boundaries. Each variant not only enhances your skills but also brings new, exciting flavors to your table. So, pick a recipe, gather your ingredients, and prepare to impress with your elevated buttermilk bread creations.
Check Out More Bread Recipes
FAQs About Buttermilk Bread Recipe
- Can I make buttermilk bread without a bread machine? Yes, you can easily make buttermilk bread without a bread machine. Traditional kneading by hand and oven baking are great ways to make this bread.
- What can I use if I don’t have buttermilk? If you don’t have buttermilk, you can make a substitute by adding a tablespoon of lemon juice or white vinegar to a cup of regular milk and letting it sit for about 10 minutes.
- Why did my buttermilk bread turn out dense? Dense bread can result from insufficient kneading, not allowing enough time for the dough to rise, or using old yeast that isn’t active anymore.
- Can buttermilk bread be frozen for later use? Absolutely! Buttermilk bread freezes well. Cool it completely, slice if desired, then wrap it tightly in plastic wrap and foil before freezing.
- How long does homemade buttermilk bread last? Homemade buttermilk bread typically lasts for about 3-4 days at room temperature. If refrigerated, it can last up to a week.
- Is buttermilk bread suitable for vegetarians? Yes, buttermilk bread is suitable for vegetarians. It contains no meat or meat products.
- Can I add other ingredients like nuts or seeds to my buttermilk bread recipe? Certainly! Feel free to add nuts, seeds, dried fruits, or herbs to your recipe for additional flavor and texture.
- Why do I need to score my bread before baking? Scoring the bread allows it to expand properly during baking and prevents the crust from cracking in unintended places.
- How do I know when my bread is fully baked? Your bread is fully baked when it’s golden brown on the outside and sounds hollow when tapped on the bottom.
- Can I make this bread gluten-free? Yes, you can make a gluten-free version using a gluten-free flour blend. Keep in mind that the texture and taste might slightly differ from traditional buttermilk bread.
These FAQs cover the common questions and concerns about making a buttermilk bread recipe, helping you to bake the perfect loaf every time.
Conclusion: Savoring the Joys of Homemade Buttermilk Bread
As we wrap up our journey through the world of buttermilk bread, it’s clear that this humble loaf is more than just a recipe; it’s a doorway to a world of culinary creativity and shared experiences. Whether you’re a beginner baker or a seasoned pro, the buttermilk bread recipe offers endless possibilities for customization, learning, and enjoyment.
From understanding the basics of ingredients and kneading to exploring advanced variations and special diet adaptations, buttermilk bread is a versatile and forgiving companion in your baking endeavors. It’s not just about the delicious, tangy loaves you’ll pull from your oven, but also about the memories you create and the skills you develop along the way.
Embrace the opportunity to experiment with different flavors, share the baking process with loved ones, and relish the satisfaction of a loaf made from scratch. Remember, each slice of buttermilk bread is a reflection of your care, creativity, and passion for baking.
So, as you continue your baking journey, keep revisiting and reinventing your buttermilk bread recipe. There’s always a new technique to master, a new flavor to try, and a new joy to discover in every loaf you bake. Happy baking!