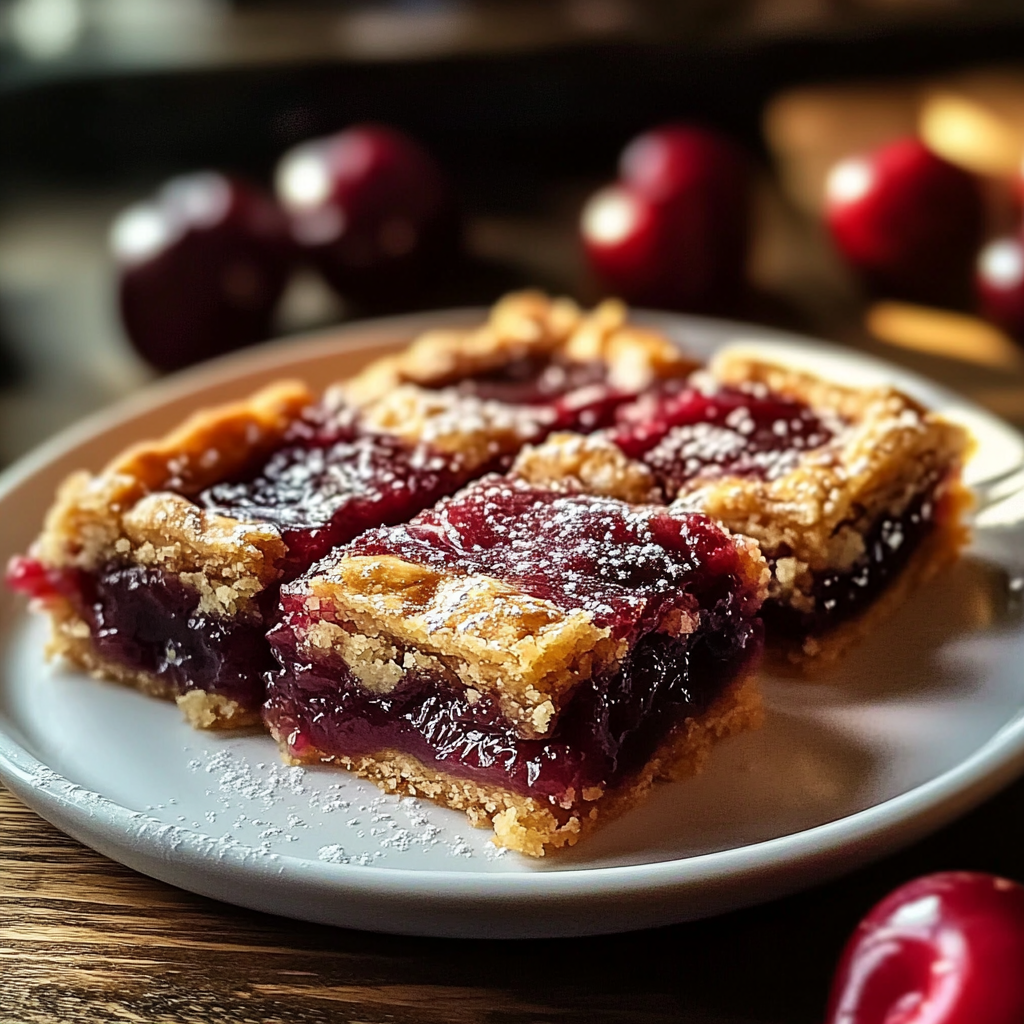

Cherry Pie Bars: Grandma’s Secret, Now Yours (No Rolling Pin Required!)
Picture this: golden afternoon sunlight spilling through lace curtains, the hum of a mixer whirring to life, and the scent of sweet cherries bubbling under a buttery crust. That’s the magic of my grandma’s kitchen, where her legendary cherry pie bars were born. And let me tell you—those bars weren’t just dessert. They were love letters baked into a 9×13 pan, the kind that made you lick your plate clean and then sneak back for “just one more sliver” when you thought no one was looking. 🍒✨
But here’s the thing: as much as I adore traditional pie, let’s be real—rolling out dough can feel like a part-time job. (And who has time for that between Zoom meetings and binge-watching true crime documentaries?) That’s why I’ve tweaked Grandma’s recipe into these cherry pie bars: all the flaky, fruity nostalgia of her classic, but with way less fuss. No crimping edges, no pie weights, and definitely no stress. Just layer, bake, and watch your kitchen transform into a serotonin factory.
These bars are your new secret weapon. Potluck? They travel like champs. Midnight snack? The glaze doubles as a built-in mood booster. Plus, they’re endlessly adaptable—swap in your favorite jam, add a nutty crunch, or go full Gilmore Girls with a side of coffee ice cream. Ready to bake memories (and maybe start a new tradition)? Let’s get mixing!
The Time I Almost Burned Down the Kitchen (Worth It)
I’ll never forget the summer I turned 12 and decided to “surprise” Grandma by baking her cherry pie bars solo. Confidence: 100%. Skill: 2%. I misread “1 tsp salt” as “1 tbsp,” used frozen pizza dough instead of crust (don’t ask), and somehow set a potholder on fire. The result? Bars so salty they could’ve seasoned a snowstorm, and smoke alarms screaming like a heavy metal band. 💥
But here’s the twist: Grandma didn’t scold me. She laughed until tears streamed down her cheeks, then taught me her golden rule: “Baking’s just edible science. Mess up? Call it an experiment and try again.” We spent that afternoon remaking the bars together, and when we pulled that perfect pan from the oven—crust gleaming, cherries glistening—it tasted like victory. Now, every time I bake these, I smell burned potholders and feel her hug. (Pro tip: Keep a fire extinguisher handy. Just in case.)
What You’ll Need (And Why It Works)
- Unsalted butter, softened – The VIP of tenderness! Soften it by leaving it on the counter for 1 hour (or zap cold butter in 10-second microwave bursts). No butter? Margarine works, but expect a less rich flavor.
- Granulated sugar – Sweetens the crust and balances the tart cherries. For a deeper flavor, swap ¼ cup with brown sugar.
- Eggs – Binds the dough. Out of eggs? Mix 1 tbsp ground flaxseed + 3 tbsp water per egg. Let it sit 5 minutes to thicken.
- Vanilla extract – Adds warmth. Try bourbon vanilla for extra oomph!
- All-purpose flour – The backbone. For gluten-free, use a 1:1 GF blend (I love Bob’s Red Mill).
- Salt – Enhances all the flavors. If using salted butter, reduce salt to ½ tsp.
- Cherry pie filling – The star! Homemade tastes amazing, but canned is clutch for busy days. No cherries? Blueberry or apple filling slays too.
- Almond extract (optional) – My secret weapon! Just ½ tsp adds a bakery-style depth. Hate almonds? Skip it or use lemon zest instead.
Let’s Bake! (No Apron Required)
- Preheat & Prep: Crank that oven to 350°F (175°C). Grease your 9×13 pan like you’re buttering up your future in-laws—get into every corner! Pro tip: Line the pan with parchment paper first for easy lifting later.
- Cream Butter & Sugar: In a large bowl, beat softened butter and sugar until it’s fluffy and pale yellow. This isn’t just mixing—it’s aerating! The more air you incorporate now, the tenderer your crust. (If your arm gets tired, blame me later.)
- Eggs & Vanilla: Add eggs one at a time, mixing fully after each. This prevents the batter from “breaking.” Stir in vanilla (and almond extract, if using). The dough should look like sunshine-yellow clouds. ☁️
- Dry Ingredients: Gently fold in flour and salt until *just* combined. Overmixing = tough crust. Lumps are okay! Think “rustic,” not “lazy.”
- Layer the Dough: Press ⅔ of the dough into the pan. Here’s my hack: Wet your fingers with cold water to prevent sticking. Spread it evenly—no craters!
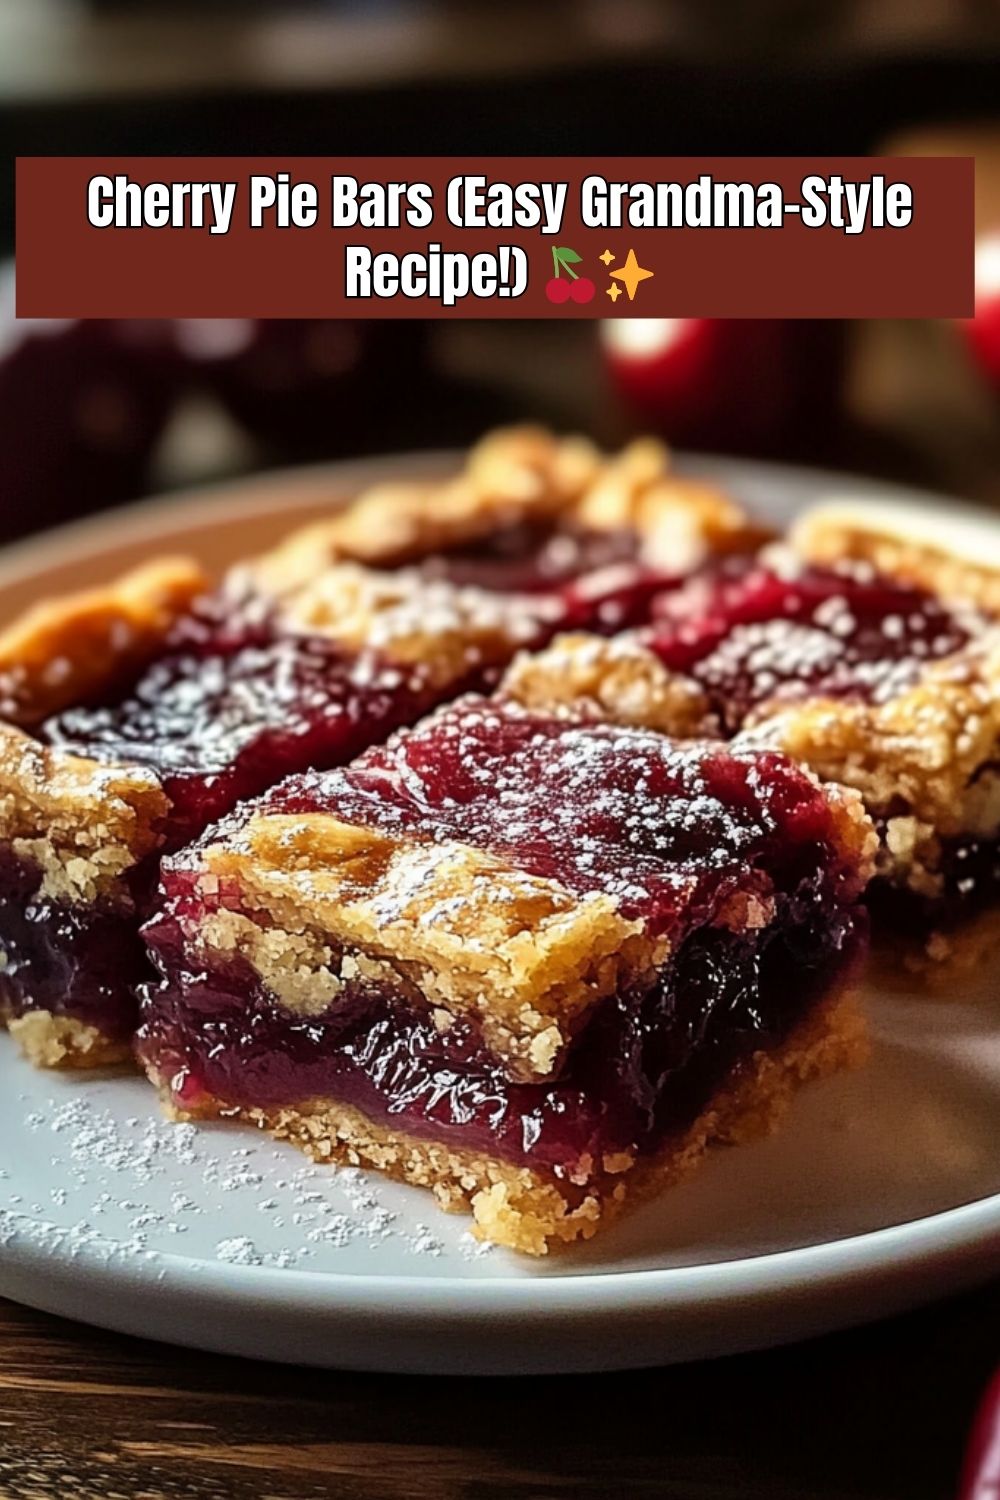
- Cherry Time: Dollop pie filling over the dough. If using canned, drain excess syrup to prevent sogginess. Sprinkle with almond extract for that “Is this from a fancy bakery?!” vibe.
- Top It Off: Drop remaining dough in teaspoon-sized clumps over the cherries. Channel your inner Jackson Pollock—perfection is overrated.
- Bake: 35-40 minutes, until the top is lightly golden. Rotate the pan halfway for even browning. Your kitchen should smell like a hug feels.
- Cool & Glaze: Let it cool COMPLETELY (patience, grasshopper). Mix powdered sugar, milk, and extract, then drizzle like you’re Picasso with a squeeze bottle.
How to Serve These Bad Boys
Slice into squares and pile them on a vintage cake stand for Insta-worthy vibes. Serve slightly warm with a scoop of vanilla ice cream (the meltier, the better). For brunch, dust with powdered sugar and pair with bitter coffee. Gift them in mason jars lined with parchment—trust me, you’ll make someone’s week. 🍰💖
Mix It Up! (Because Rules Are Boring)
- Berry Bliss: Swap cherries for raspberry or blackberry pie filling. Add lemon zest to the dough for tang.
- Nutty Buddy: Stir ½ cup chopped almonds or pecans into the topping dough.
- Choco-Cherry: Sprinkle ⅓ cup chocolate chips over the cherry layer before baking. Yes, it’s life-changing.
- Streusel Style: Replace the topping dough with a crumble: ½ cup oats + ¼ cup brown sugar + 3 tbsp cold butter.
- Vegan Vibes: Use plant-based butter and flax eggs. Opt for organic sugar.
Confessions of a Cherry Pie Bar Addict
True story: I once hid an entire pan of these in my laundry room to “save them for guests.” Spoiler: There were no guests. Over the years, I’ve learned a few things: 1) A pizza cutter slices clean bars faster than a knife. 2) Adding cornstarch (1 tbsp) to canned filling thickens it perfectly. 3) These taste even better on day two—if they last that long. 🏃♀️💨
Your Questions, Answered
Q: Can I use fresh cherries?
A: Absolutely! Pit 3 cups of cherries, then simmer with ¼ cup sugar and 2 tbsp cornstarch until thickened. Cool before using.
Q: Why is my crust crumbly?
A: Likely overmixed dough. Next time, stop stirring as soon as the flour disappears. If it’s too late, press the crumbs into the pan—they’ll still taste amazing.
Q: Can I freeze these?
A: Yes! Freeze unglazed bars in airtight layers (parchment between each). Thaw overnight, then glaze before serving.
Q: Help—my filling sank!
A: No stress! It’s likely due to extra syrup in the canned filling. Next time, drain it thoroughly or add 1 tsp cornstarch to the cherries.
Nutrition Facts (Because Balance Is Key… Sorta)
Per bar (24 servings): 240 calories, 10g fat, 35g carbs, 22g sugars. Worth every bite! Store leftovers (lol) covered at room temp for 3 days or refrigerated for 5.
Final Thoughts: Sweet Nostalgia, Simplified
And just like that, you’ve got Cherry Pie Bars that taste like Grandma’s kitchen—minus the rolling pin, the flour-dusted counters, and the inevitable pie crust meltdown. These bars are proof that comfort food doesn’t have to be complicated. With a buttery base, ruby-red filling, and that sweet vanilla glaze? It’s like a warm hug you can cut into squares.
What I love most about this recipe isn’t just the flavor (though trust me, it’s next-level), it’s the vibe. It’s casual enough for weeknight baking but charming enough to bring to a baby shower or backyard brunch. No pie dish, no lattice drama—just one pan, a spoon, and the power to create pure joy. ✨
These bars have become my go-to for just about everything: neighborly favors, impromptu celebrations, and those “I need dessert and a blanket” moments. Each bite carries a little whisper of Grandma’s legacy—sweet, a little sassy, and always made with love (and butter).
So whether you’re baking them to share or sneak pieces while binge-watching your favorite show, know this: you’re not just making dessert. You’re making memories. Delicious, slightly sticky, cherry-stained memories.
And hey, if your dough’s a little uneven or your glaze drips off the sides? Good. That’s how you know it’s made with heart.
Now go forth, bake boldly, and save yourself a corner piece—because the baker always gets the best bite. 💖