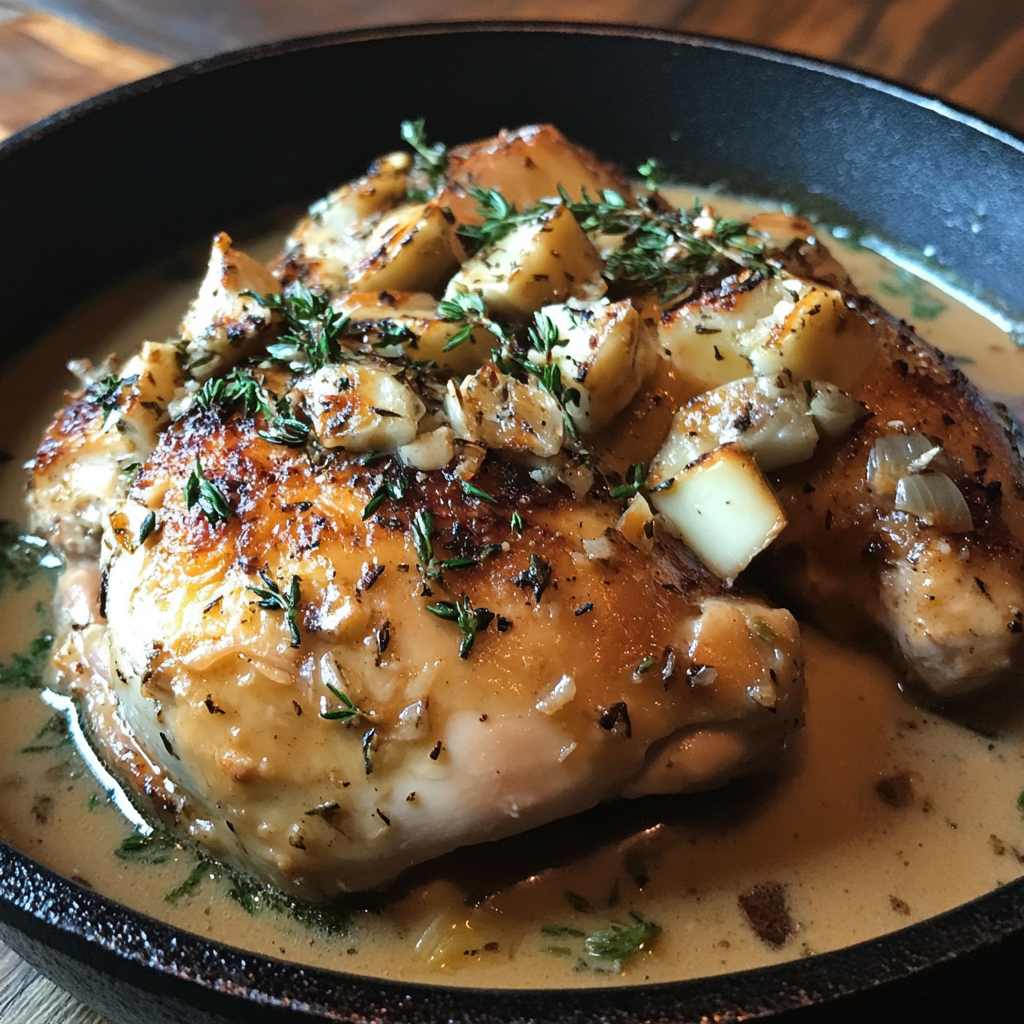

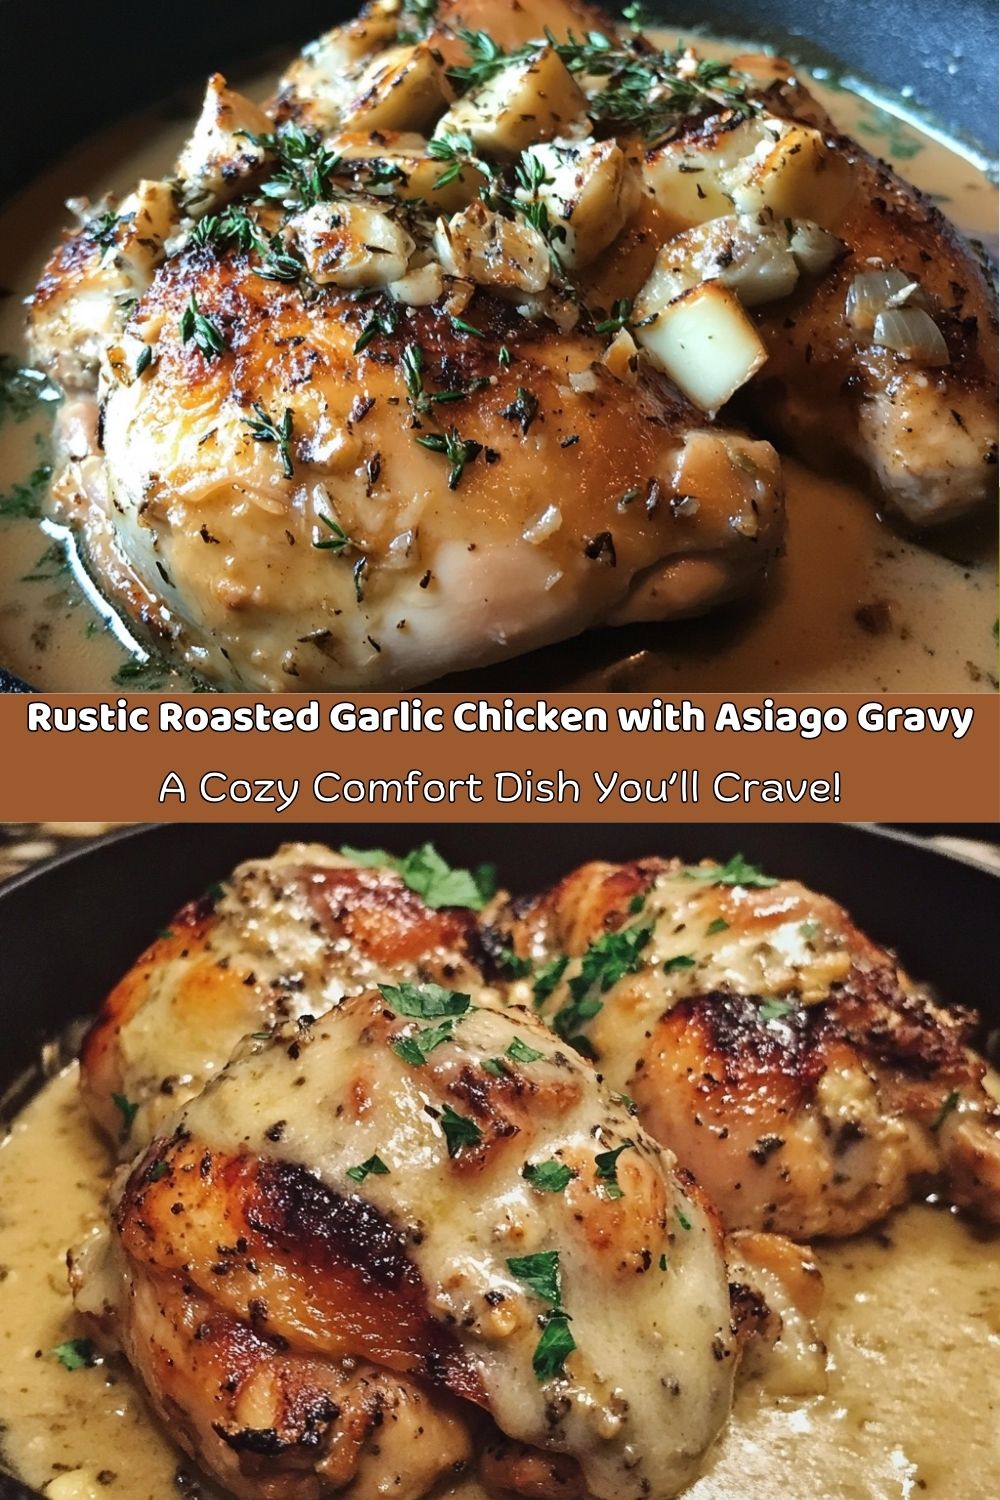
Rustic Roasted Garlic Chicken with Asiago Gravy: A Cozy Comfort Dish You’ll Crave!
Hey there, foodie friend! 🌟
Get ready to meet your new dinner obsession: Rustic Roasted Garlic Chicken with Asiago Gravy! Imagine juicy, golden chicken bathed in a silky, savory gravy bursting with the sweet mellow flavor of roasted garlic and the nutty richness of Asiago cheese. It’s the kind of dish that makes your kitchen smell like a five-star bistro and your family come running to the table.
Today, I’m sharing everything you need to know to create this cozy masterpiece at home. Whether you’re a seasoned home chef or just looking for an unforgettable meal to wow your crew, this one’s got your name written all over it.
Why You’ll Love This Recipe
- Flavor Explosion: Roasted garlic brings out an incredible sweet depth, and Asiago gives the gravy an irresistible creamy, nutty punch.
- Rustic Vibes: Simple, wholesome ingredients and a down-home feel.
- Versatile: Serve it with mashed potatoes, pasta, or rustic bread.
- Make-Ahead Friendly: The garlic can be roasted ahead, and the chicken reheats beautifully.
- Company-Worthy: Fancy enough for guests, easy enough for a cozy weeknight.
Ingredients You’ll Need
For the Roasted Garlic:
- 2 whole heads of garlic
- 2 teaspoons olive oil
- Pinch of salt
For the Chicken:
- 4 bone-in, skin-on chicken thighs (or breasts if you prefer)
- 1 tablespoon olive oil
- 1 teaspoon salt
- 1/2 teaspoon black pepper
- 1 teaspoon smoked paprika
- 1 teaspoon garlic powder
- 1 teaspoon onion powder
For the Asiago Gravy:
- 2 tablespoons butter
- 2 tablespoons flour
- 1 1/2 cups chicken broth
- 1/2 cup heavy cream
- 1/2 cup freshly grated Asiago cheese
- Roasted garlic cloves (from earlier)
- 1 teaspoon fresh thyme leaves (or 1/2 teaspoon dried)
- Salt and pepper to taste
Step-by-Step: How to Make Rustic Roasted Garlic Chicken with Asiago Gravy
Step 1: Roast the Garlic
Preheat your oven to 400°F (200°C).
Slice the tops off the garlic heads to expose the cloves, drizzle with olive oil, and sprinkle with a pinch of salt. Wrap them in foil and roast for 35-40 minutes until the cloves are buttery soft and caramelized.
Tip: You can do this step a day ahead and store the roasted garlic in the fridge!
Step 2: Prep and Sear the Chicken
Pat the chicken dry with paper towels (this helps it get crispy!). Rub it all over with olive oil, salt, pepper, smoked paprika, garlic powder, and onion powder.
Heat a large oven-safe skillet over medium-high heat. Sear the chicken, skin-side down first, until the skin is golden and crispy — about 5-7 minutes. Flip and sear the other side for 3-4 minutes.
Transfer the skillet to the oven and roast at 400°F for about 20-25 minutes, until the chicken is fully cooked (internal temp 165°F).
Step 3: Make the Asiago Gravy
Remove the chicken from the skillet and set aside (tent with foil to keep warm).
In the same skillet, melt the butter over medium heat. Whisk in the flour and cook for 1-2 minutes to make a golden roux.
Slowly whisk in the chicken broth and heavy cream, scraping up all those delicious brown bits from the pan.
Squeeze the roasted garlic cloves out of their skins and mash them lightly with a fork. Stir the garlic into the gravy.
Add the Asiago cheese and thyme, stirring until the cheese melts and the gravy thickens. Season with salt and pepper to taste.
Step 4: Bring It All Together
Nestle the chicken back into the skillet with the gravy. Spoon some of that luscious sauce over the chicken. Let it all bubble together for a couple of minutes so the flavors marry.
Sprinkle with a little extra thyme if you’re feeling fancy. Serve hot and watch everyone’s eyes light up!
Pro Tips for Perfect Rustic Garlic Chicken
- Use Bone-In, Skin-On Chicken: It adds the most flavor and keeps the meat juicy.
- Roast Extra Garlic: Trust me, you’ll want extra to spread on bread or toss in a salad.
- Don’t Rush the Roux: Give your flour and butter time to cook out that raw flour taste.
- Fresh Asiago Matters: Pre-shredded cheese doesn’t melt as smoothly. Freshly grated is worth the tiny extra effort.
- Thicken the Gravy to Your Liking: Add a little more broth if it gets too thick.
What to Serve Alongside
Oh, you’ve got options, friend!
- Buttery Mashed Potatoes: Let that Asiago gravy puddle all over them.
- Creamy Polenta: Another cozy pairing that’s pure comfort.
- Rustic Bread: Perfect for mopping up every last bit of gravy.
- Roasted Vegetables: Carrots, Brussels sprouts, or asparagus work great.
- Simple Green Salad: Add a fresh, crisp balance to the richness.
Fun Variations to Try
- Mushroom Magic: Add sautéed mushrooms to the gravy for an earthy twist.
- Swap the Cheese: Try Parmesan, Gruyère, or even Fontina if you’re feeling adventurous.
- Spice It Up: Add a pinch of crushed red pepper to the gravy.
- Lemon Lover: Squeeze in a bit of fresh lemon juice for a pop of brightness.
- Herb Overload: Mix in fresh parsley, sage, or rosemary for a different herbal vibe.
How to Store and Reheat
- Storing: Cool completely and store in an airtight container in the fridge for up to 3 days.
- Reheating: Gently reheat in a covered skillet over medium-low heat. Add a splash of chicken broth to loosen the gravy if needed.
- Freezing: You can freeze the cooked chicken and gravy separately for up to 2 months. Thaw overnight in the fridge before reheating.
Final Thoughts: Rustic Roasted Garlic Chicken with Asiago Gravy Is Pure Magic
There’s something truly special about a meal that feels both hearty and elegant at the same time. Rustic Roasted Garlic Chicken with Asiago Gravy hits that sweet spot perfectly. It’s simple enough for a cozy family dinner yet stunning enough for a dinner party centerpiece.
Roasting the garlic transforms it into sweet, mellow gold. Pairing that with creamy Asiago gravy and crispy-skinned chicken is just… chef’s kiss. 🍽️
Give this recipe a try the next time you want to make something unforgettable. Light a candle, pour yourself a glass of wine, and let the cozy kitchen magic happen.
Happy cooking, friend! 🍲