

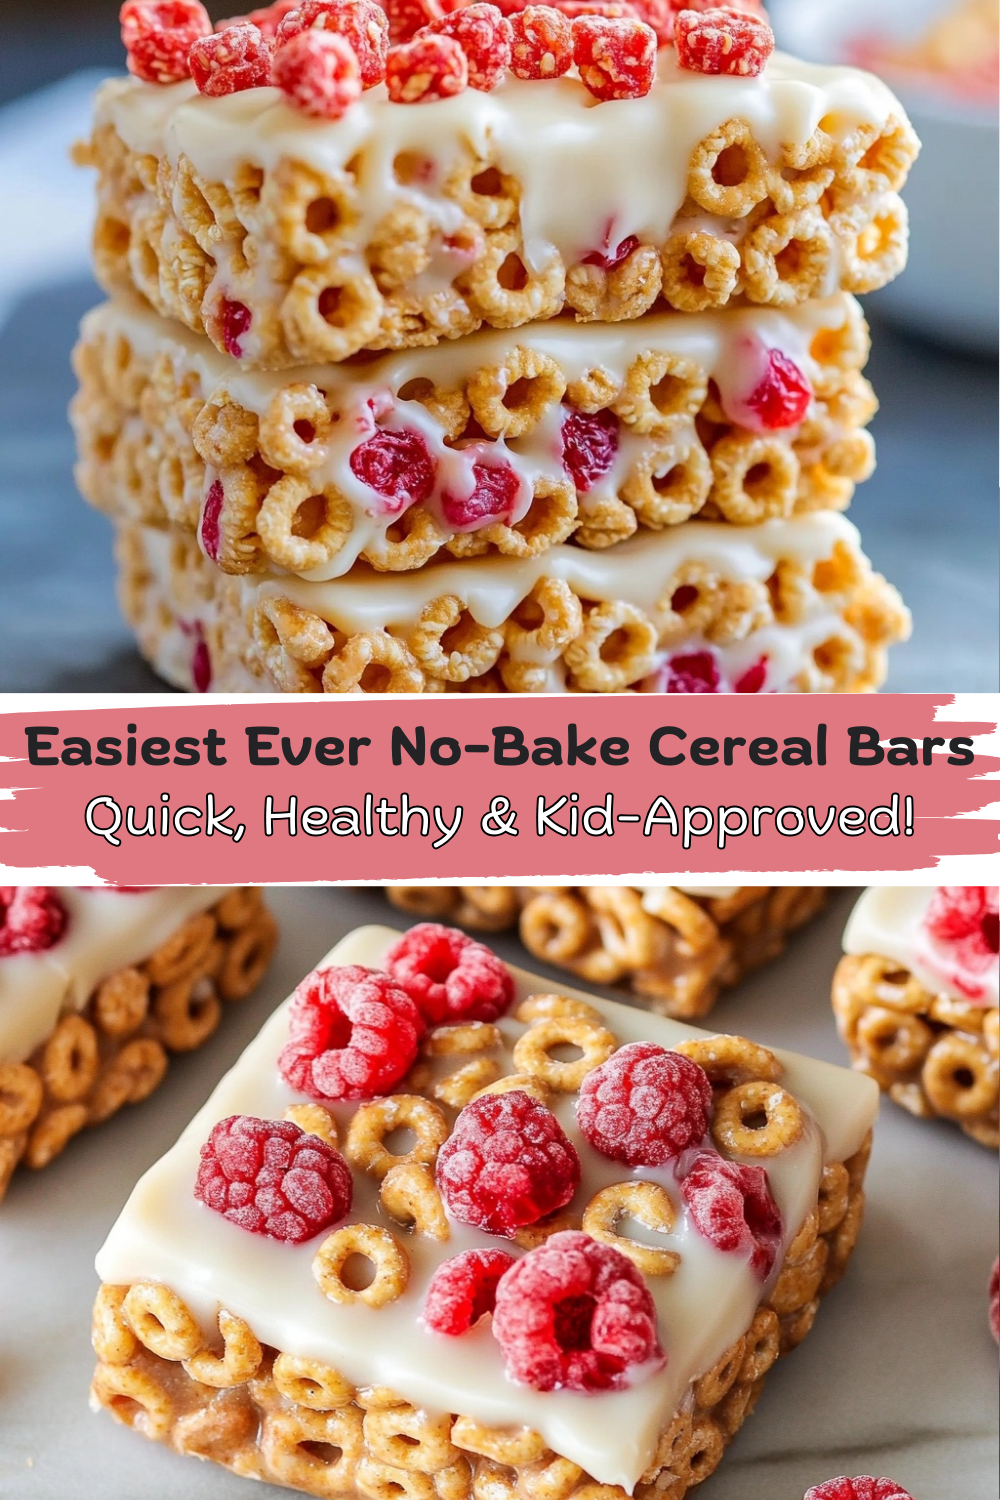
No-Bake Cereal Bars – A Sweet Bite of Simplicity!
Hey there, foodie friends! Chef Katie here, ready to add some ease, flavor, and you bet—lots of smiles to your snack routine. I have a delightful treat today that checks all the boxes: super easy, no-bake, kid-friendly, and totally delicious. Yep, get ready to fall in love with these No-Bake Cereal Bars! 🍯🥜💖
Mornings can be busy, right? Especially when I’ve got my grandkids visiting. Believe me, as much as I adore having those little munchkins around, getting them dressed and ready for the day can feel like a marathon! So, amid the giggles, bookbags, and sneakers flying everywhere, I discovered this tasty lifesaver. One chaotic morning, out of pure necessity, I whipped up these cereal bars in less than five minutes, purely from pantry staples. Would you believe they instantly became a family favorite, requested over and over during visits? Whether it’s breakfast on the go, after-school munchies, or a sweet late-night nibble, these bars have quickly become our yummy family tradition. Ready to make some tasty memories of your own? Let’s dive right in!
Why You’ll Absolutely Adore These No-Bake Bars:
– Ridiculously simple—5 minutes and done!
– Versatile ingredients that you probably have in your kitchen already.
– Kid-approved (and honestly, adult-approved, too!).
– Perfectly customizable to suit your tastebuds.
– Naturally sweetened, gluten-free option, with added protein if desired.
Let’s get cooking—rather, no-cooking—my friends! 🍽️😉
Memories from the Kitchen: The Magic of Grandma’s Secret Cereal Bars
Let me share a quick little story before we continue. One memorable weekend, my spirited grandson Oliver woke up way earlier than usual. With sleepy eyes, I wasn’t quite ready to stir up pancakes or waffles. He asked if we could make something together, and in that moment, I officially became the cool grandma—the kitchen magician who made yummy snacks without even touching the stove! That morning, Ollie became my beloved sous-chef as we poured, stirred, and pressed together these tasty cereal bars. Every bite from that batch had a sprinkle of love, laughter, and pure joy. These sweet, chewy treats instantly became our special kitchen secret—now, I’m passing the secret onto you!
🛒 Ingredients You’ll Need
One of the best parts is the simple ingredient list. Just a few items, and you’re on the way to snack heaven:
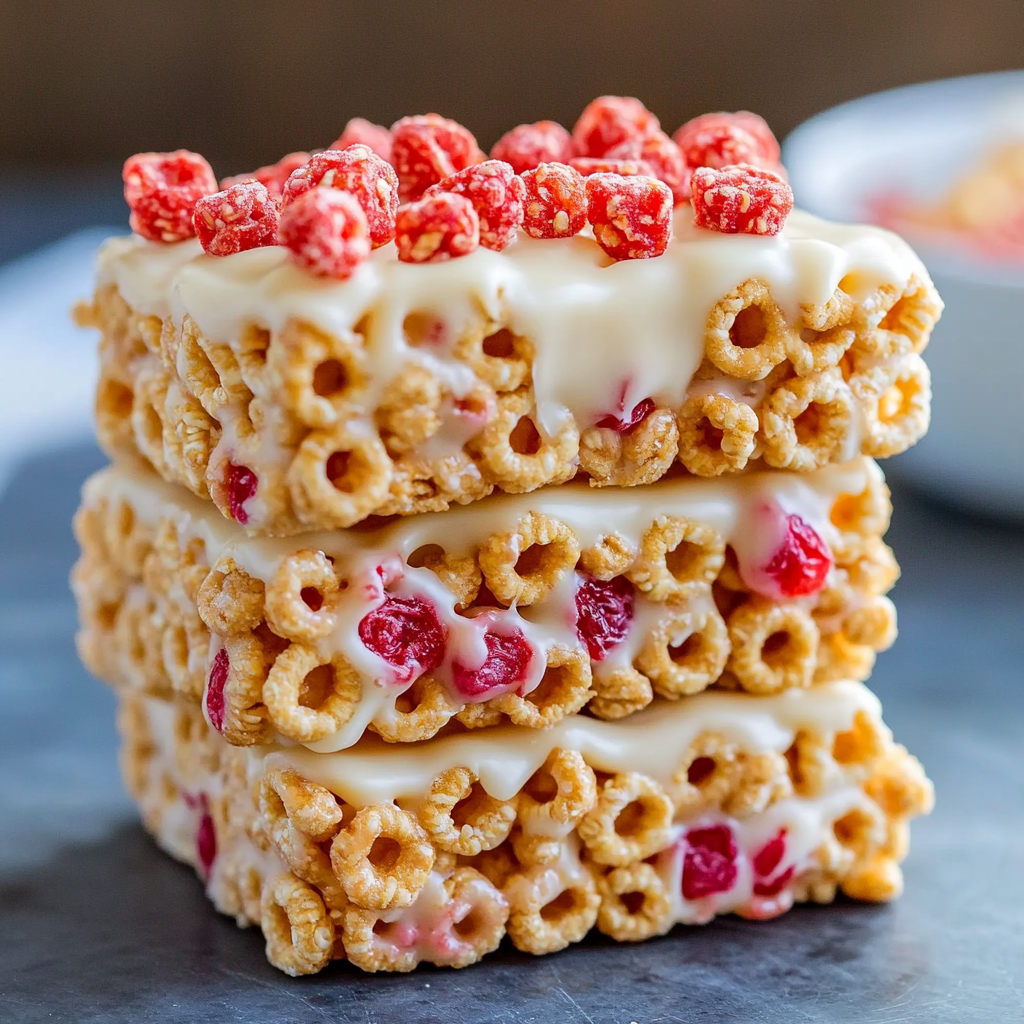
– 3 cups cereal of your choice (crispy rice, oat clusters, Cheerios, shredded wheat—all delicious!)
– ⅔ cup peanut butter or any nut (or seed!) butter you love
– ½ cup agave nectar, honey, or brown rice syrup
– Optional (but recommended!): ½ teaspoon salt (balances the sweetness beautifully!)
– Optional for an extra protein punch: 3 tablespoons protein powder (vanilla or chocolate—yum!)
Feel free to get creative and have fun with options. There’s no wrong way to make these!
👩🍳 Step-by-Step: Let’s Make Those Bars!
Step 1: Line & Prep Your Pan
Start off by lining an 8-inch square baking pan with parchment paper. This little trick means easy cleanup later—win-win!
Step 2: Warm Up Nut Butter (if needed!)
If your peanut or nut butter is on the firm side (we’ve all been there), give it a quick microwave or warm it gently in a pan. Just warm enough, so it’s smooth and stir-able.
Step 3: Mix it Up
In a large mixing bowl, gently stir together the cereal, warmed nut butter, sweetener (agave, honey, or syrup) salt, and protein powder, if using. Mix until everything is well combined, coated, sticky, and delicious!
Step 4: Press into Pan
Pour your tasty cereal mix into the parchment-lined pan. Pro tip: use another sheet of parchment laid over the top to press your bars firmly and evenly into the pan. This will help your masterpiece hold together nicely later on!
Step 5: Chill & Slice
Pop those bars into the freezer for at least 30 minutes (this lets them firm up), then remove from the pan by lifting the parchment edges. Cut into 9 lovely squares or rectangular bars.
Voila! Deliciousness, effortlessly made! 🎉
🥄 Serving Suggestions & Tasty Additions!
Want to jazz it up further? Here are some ways we love these bars at my house:
– Kiddos’ favorite: sprinkle a handful of mini chocolate chips over the bars before pressing down—instant happiness!
– Fruity fun: stir in dried cranberries, cherries, chopped apricots, or raisins.
– Crunchy upgrade: mix in chopped almonds, pecans, cashews, pumpkin seeds, or sunflower seeds for extra flavor.
– Feeling festive? Drizzle a bit of melted chocolate and a sprinkle of flaked sea salt for a gourmet touch!
🔥 Pro Chef Katie’s Tips:
– Play around and mix cereals to get crunch, texture, and flavor variety!
– If your bars feel too sticky, add more cereal; if too crumbly, a little more nut butter guarantees perfect texture.
– Get kids involved! This no-fail recipe is perfect for little hands—fun and tasty bonding time!
🥣 Prep & Nutrition Details
– Prep Time: 5 minutes (really!)
– Chill Time: 30 minutes
– Total Time: 35 minutes
– Yield: 9 perfect bars
– Dietary Bonuses: Kid-approved, gluten-free (if using GF cereal), protein-packed (optional), naturally sweet, vegetarian-friendly.
Nutrition Snapshot (per bar—approximately, depending on ingredients):
– Calories: 170
– Protein: 5g (with protein powder and peanut butter)
– Carbs: 22g
– Healthy Fats: 8g
– Fiber: 2g
– Sugar: 10g (naturally occurring from sweeteners and cereal)
Ready, Set, Yum!
Now, how easy (and delicious) was that? Trust me—making these No-Bake Cereal Bars fits into literally any schedule. Even on those whirlwind mornings when shoes go missing and breakfast seems like mission impossible, these tasty bars come to the rescue. I hope you have as much fun making and devouring these bars as our family and friends have through the years!
Go ahead—give them a try, and don’t forget to let me know how yours turned out. I’d absolutely adore seeing your creations! Happy no-baking, friends. Stay delicious! ❤️
“Until blissful bites and kitchen delights next time!”