
Easter is the perfect time to get creative in the kitchen, and what better way to celebrate than with a fun, colorful dessert that’s as delightful to look at as it is to eat? Our Easter Cake in a Jar is a unique twist on the classic cupcake—a layered treat that brings a pop of color and a burst of festive cheer to any gathering. Yielding four servings per batch, this make-ahead dessert is designed to impress your guests while satisfying your own sweet cravings. In fact, don’t be surprised if you find yourself enjoying one before your guests even arrive!
The Inspiration Behind Cake in a Jar
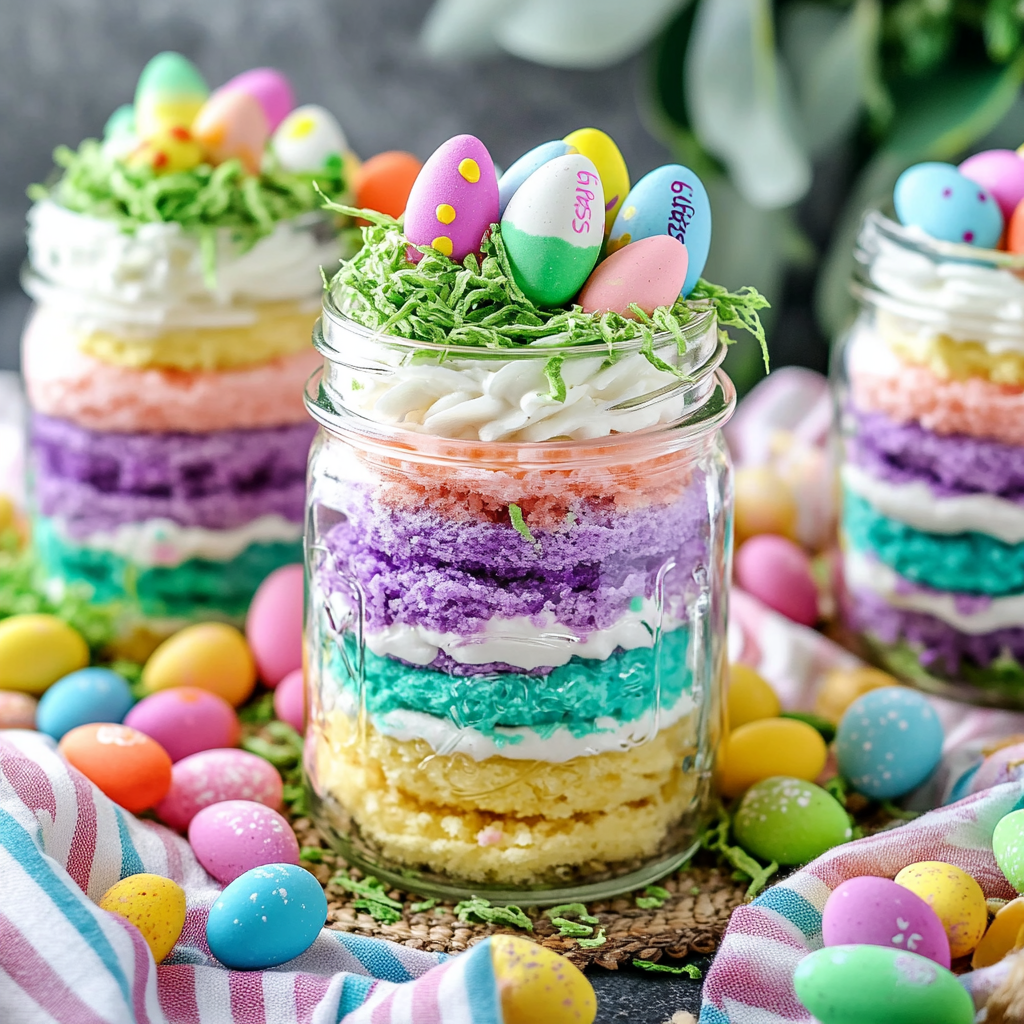
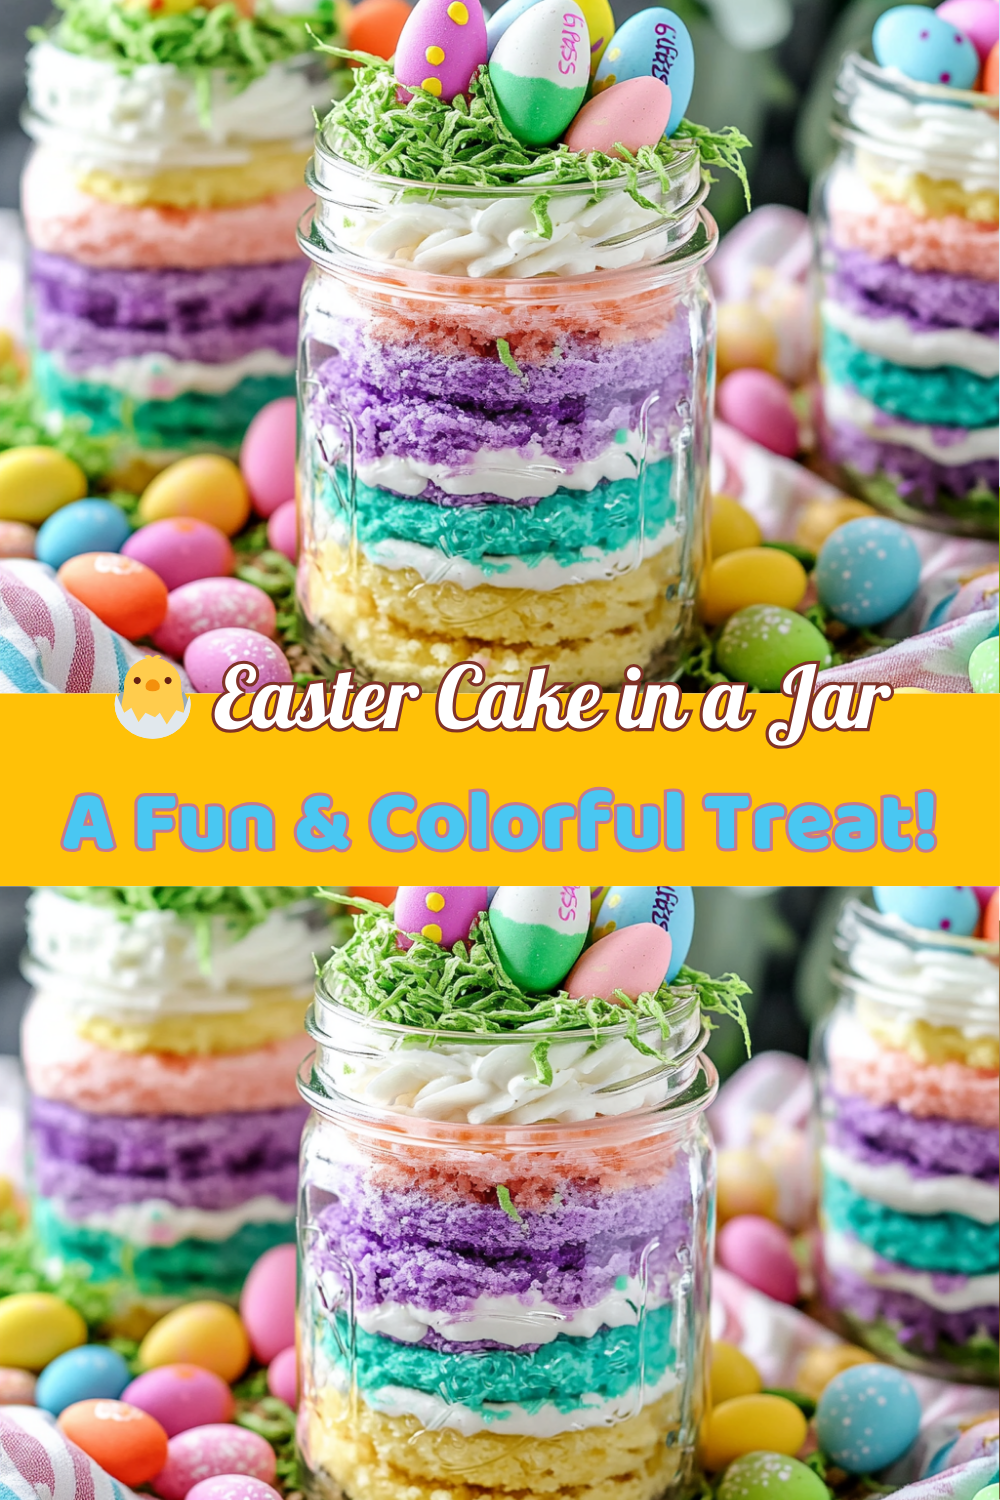
The idea for cake in a jar isn’t entirely new, but this Easter version takes it to a whole new level. Instead of the typical cupcake or cake slice, this recipe transforms the dessert into an artful layered treat, beautifully presented in a small jar. The concept is simple yet innovative: use a white cake mix to create distinct colored layers of cake, alternate these with smooth swirls of frosting, and top it all off with festive edible decorations like Easter grass and jelly bean eggs.
This dessert is not only visually stunning but also wonderfully practical. Since it’s made ahead of time, you can prepare it in advance and let the flavors meld while you attend to your Easter celebrations. Its compact size makes it easy to serve and even easier to enjoy. Whether you’re hosting an intimate family brunch or a larger holiday party, this Easter Cake in a Jar is sure to become a conversation starter.
Essential Ingredients and Tools
Before you get started, gather all your ingredients and necessary supplies. The simplicity of the recipe means you can create a show-stopping dessert without a long list of components. Here’s what you’ll need:
Ingredients:
- 1 White Cake Mix
Prepare the batter as per the package directions. This will be the base of your colorful layers. - 1 Can White Frosting
This will be used for both layering inside the jar and piping over the top. - Edible Easter Grass
Adds a fun, festive touch reminiscent of a little nest. - Jelly Bean Easter Eggs
These playful decorations complete the look. - Food Coloring (pink, yellow, teal, purple)
To create distinct, vibrant layers of colored cake. - 4 Jars (4-6 oz each)
These will serve as the vessel for your Easter Cake in a Jar. - Optional: Easter Sprinkles
For an extra dash of decoration if you prefer a sprinkle finish over the edible grass.
Tools:
- Mixing Bowls (at least 4 small ones)
For separating the batter into different colors. - Cupcake Tins
To bake the colored cupcakes. - Plastic Piping Bag (or a resealable plastic bag with a corner snipped off)
For piping the frosting into the jars. - Spatula or Spoon
To help layer the cake crumbles and frosting evenly. - Cooling Racks
To let the cupcakes cool completely before crumbling.
Step-by-Step Instructions
1. Prepare the Cake Batter
Start by making the cake batter using your favorite white cake mix, following the package directions exactly. Once your batter is smooth and ready, divide it evenly into four small bowls. Each bowl will be used to create a different colored cake layer for your jars.
2. Add Color to the Batter
To achieve a vibrant, multi-colored effect, add a few drops of food coloring to each bowl. Use pink, yellow, teal, and purple to create a festive palette that screams Easter. Stir each bowl until the color is uniformly mixed into the batter. The brighter the colors, the more striking your final presentation will be.
3. Bake the Cupcakes
Scoop the colored batter into cupcake tins, ensuring that each color has its own dedicated section. The batter in each tin should yield about four cupcakes per color. Place the tins in your preheated oven and bake according to the package directions. This step is crucial because you’re creating the individual layers that will eventually come together in your jars.
4. Cool and Crumble the Cupcakes
Once baked, allow the cupcakes to cool completely. When they’re cool enough to handle, carefully crumble them into separate bowls, keeping each color separate. The crumbling process is key—it gives you the texture you need for layering in the jar while allowing the vibrant colors to remain distinct.
5. Prepare the Frosting for Piping
While your cake layers are cooling, prepare your frosting. Squeeze the can of white frosting into a plastic piping bag, or transfer it into a resealable plastic bag and cut a small corner off. This setup will make it easy to pipe thin, even layers of frosting over each layer of cake in your jars.
6. Assemble the Cake in a Jar
Now for the fun part—assembling your Easter Cake in a Jar. Start by taking one of your 4-6 oz jars and add a small scoop of the first colored cake crumble (for example, purple). Next, pipe a thin layer of frosting over this cake layer, making sure the frosting touches the edges of the jar. This not only seals in the flavor but also creates a visible separation between layers.
Repeat the process by adding the next colored cake layer (say, yellow) followed by another thin layer of frosting. Continue with the remaining two colors (pink and teal), ensuring that each layer is neatly defined by the frosting. The final top layer should consist solely of frosting, which will frame your colorful cake layers when viewed from the outside of the jar.
7. Add the Finishing Touches
To transform your dessert into a true Easter masterpiece, decorate the top of each jar. Sprinkle a small amount of edible Easter grass or add a few jelly bean Easter eggs on top. Alternatively, if you prefer a simpler presentation, a light dusting of Easter sprinkles will do the trick. The idea is to mimic the look of a tiny Easter nest—inviting, festive, and irresistibly cute.
8. Chill and Serve
For the best flavor and texture, allow your assembled jars to sit for about 30 minutes before serving. This inactive time lets the layers settle and the flavors meld together. When you’re ready to serve, simply grab a jar and enjoy your festive, ready-to-eat dessert.
Tips for a Perfect Easter Cake in a Jar
Get Creative with Colors
Don’t be afraid to experiment with different food color combinations. While our recipe calls for pink, yellow, teal, and purple, you can customize the colors to match your party theme or personal preference. The more vibrant the colors, the more eye-catching your dessert will be.
Consistency is Key
When crumbling the cupcakes, aim for a consistent texture so that each layer in your jar is evenly distributed. You want a balance between the cake and frosting so that every bite is just as delightful as the last.
Make-Ahead Convenience
One of the best aspects of this recipe is that it’s perfect for make-ahead dessert planning. You can prepare the cupcakes, crumble them, and even assemble the jars a day in advance. Store them in the refrigerator and pull them out just before your event for an instant, crowd-pleasing dessert.
Enhance the Flavor
While the white cake mix provides a neutral base that allows the frosting and decorations to shine, you can always add your own twist. Consider mixing in a teaspoon of vanilla extract into the batter or even a dash of lemon zest to brighten the flavors. Small tweaks can elevate the overall taste and make the recipe uniquely yours.
Presentation Matters
Since these cakes are served in jars, presentation is everything. Choose jars with a clear, attractive design so that the colorful layers are visible. If you’re hosting an Easter party, arrange the jars on a decorative tray or basket along with additional Easter-themed decorations for an extra festive touch.
Serving Ideas and Occasions
A Unique Party Dessert
Easter Cake in a Jar is an ideal dessert for any Easter celebration. Its charming appearance and portable nature make it a perfect party treat that guests can easily grab and enjoy. Whether placed on a dessert table or handed out as party favors, these jars are sure to delight both children and adults.
A Fun Make-Ahead Treat
For busy hosts, the ability to prepare this dessert ahead of time is a major plus. Spend a relaxed afternoon in the kitchen creating these colorful treats and have more time to enjoy the holiday with your guests. The preparation process is not only fun but also a great way to get creative with your baking.
A Personalized Gift
Looking for a unique, homemade gift idea? Consider preparing a batch of Easter Cake in a Jar and decorating the jars with personalized labels or ribbons. They make a thoughtful, delicious gift that captures the spirit of the season and shows off your baking skills.
Nutrition Information and Portion Control
Each jar yields one serving, with the recipe yielding a total of four servings. Here’s the approximate nutritional breakdown per serving:
- Calories: 120
- Total Fat: 5g
- Saturated Fat: 1g
- Trans Fat: 0g
- Unsaturated Fat: 3g
- Cholesterol: 47mg
- Sodium: 89mg
- Carbohydrates: 17g
- Fiber: 0g
- Sugar: 12g
- Protein: 3g
While this dessert is a festive treat meant for occasional enjoyment, these nutritional details make it a relatively light option compared to more decadent holiday desserts. Enjoy it guilt-free as a sweet bite that won’t derail your overall healthy eating plan.
Embracing the Fun of Seasonal Baking
Baking for the holidays is more than just a culinary exercise—it’s an opportunity to create memories and share joy with loved ones. Easter Cake in a Jar exemplifies this spirit. Its playful presentation and delightful flavors evoke the whimsy of Easter, making it a perfect dessert to bring smiles to your family and guests.
Whether you’re an experienced baker or a novice in the kitchen, this recipe invites you to have fun with color, texture, and design. The process of creating distinct layers of colored cake, piping delicate swirls of frosting, and finally decorating with edible Easter accents is as enjoyable as it is rewarding. It’s a chance to let your creativity shine while crafting something that’s not only delicious but also visually enchanting.
Final Thoughts
Easter Cake in a Jar is a celebration of creativity and festivity—a dessert that transforms a simple white cake mix into a work of art. Its unique concept, coupled with the ease of preparation, makes it a standout addition to your Easter menu. Whether you’re planning a full-fledged party or a quiet family gathering, this cake in a jar will bring a touch of magic and a burst of color to your celebrations.
By following the step-by-step instructions and embracing a little creative freedom with your color choices and decorations, you can create a dessert that is both a feast for the eyes and a delight for the palate. The layers of colored cake and frosting, combined with festive decorations, create a dessert that is as fun to make as it is to eat. And remember—if you find one irresistible enough to snack on before the guests arrive, you’re not alone!
So, this Easter, let your baking creativity run wild. Prepare a batch of Easter Cake in a Jar, impress your guests with its playful design, and enjoy every delicious bite of this make-ahead treat. Happy Easter, and happy baking!
With its perfect balance of sweetness, vibrant colors, and festive charm, Easter Cake in a Jar is destined to become a beloved holiday tradition. Gather your ingredients, set aside some time for creative baking, and let this dessert bring a smile to every face. Enjoy the process, relish the flavors, and celebrate the joy of the season with this delightful treat.
Happy Easter and enjoy every jar!