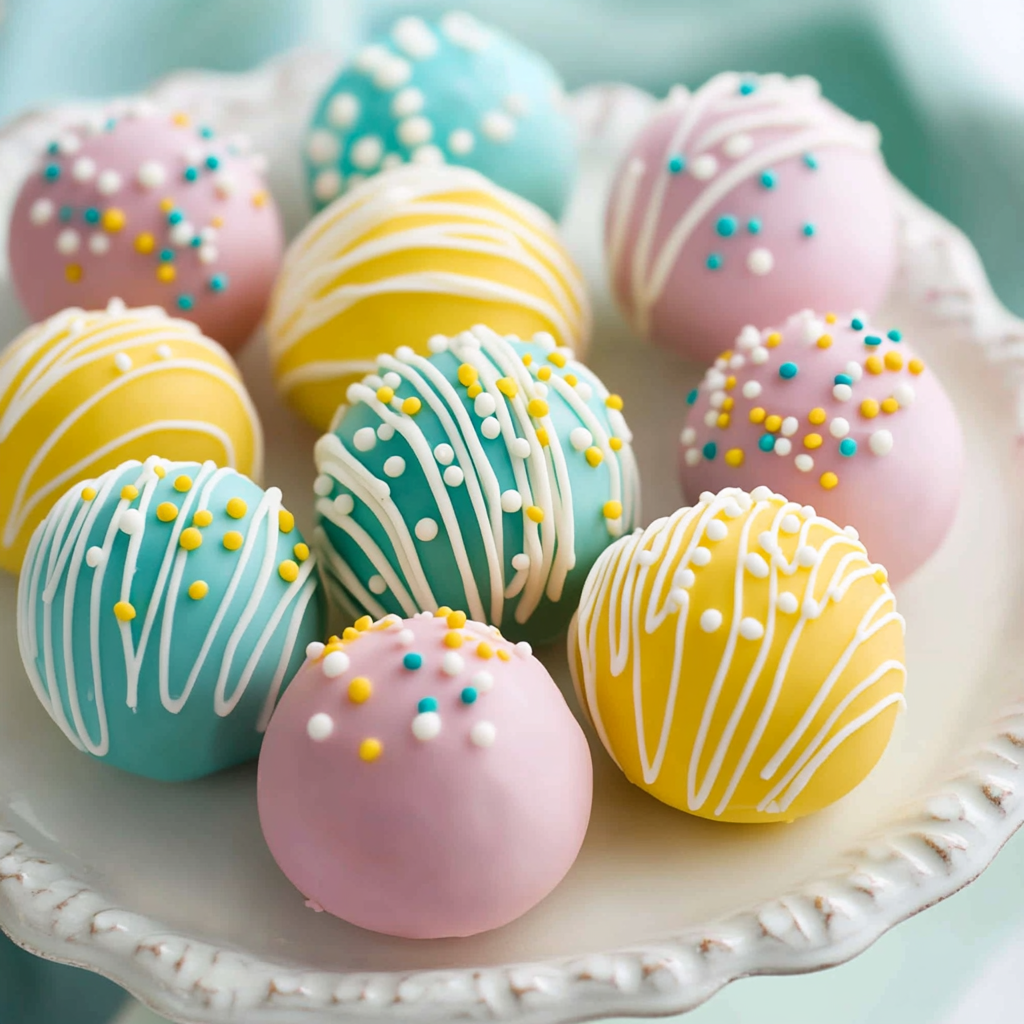

Easter is a time of renewal, joy, and indulgence in delightful treats that bring families together. One dessert that has captured the hearts and taste buds of many is these adorable Easter Cake Pops. Rated highly by fans and adored for their charming presentation and delectable taste, these cake pops are not only a feast for the eyes but also a perfect party treat. In this post, we’ll take an in-depth look at the recipe, explore its origins and versatility, and provide you with expert tips and creative ideas to ensure your Easter celebration is as sweet and memorable as can be.

A Sweet Tradition: The Story Behind Easter Cake Pops
Easter is traditionally celebrated with a variety of confections—from chocolate bunnies to pastel-colored eggs—but nothing quite stands out as a centerpiece like cake pops. These bite-sized treats have become increasingly popular because they combine the best of both worlds: the rich, moist texture of cake and the smooth, creamy coating of chocolate and buttercream.
Imagine a bouquet of perfectly formed cake pops, each one decorated with pastel hues, sprinkles, and a hint of whimsical elegance that makes them the perfect centerpiece for any Easter table. Whether you’re hosting a large family gathering or a small intimate celebration, these cake pops offer a fun, interactive dessert that guests can easily grab and enjoy on the go. Their eye-catching design also makes them an ideal project for a family baking day, where kids and adults alike can get creative with decorating.
The concept behind Easter Cake Pops is not just about dessert—it’s about creating lasting memories and traditions. As you dip, decorate, and display your cake pops, you’re engaging in an activity that brings everyone closer together, adding an extra layer of sweetness to the holiday festivities.
Detailed Recipe Overview
This recipe yields about 30 cake pops, with a total preparation and process time of approximately one hour. It is divided into two main components: the homemade buttercream frosting and the cake pops with dipping chocolate. Let’s explore each element in detail.
Equipment Needed
- 20 cake pop sticks (or more if you have extra)
- A stand mixer fitted with a paddle attachment (for the buttercream)
- Large and medium mixing bowls
- Microwave-safe bowls (for melting chocolate)
- A 9×13″ baking pan for the cake
- A medium cookie scoop
- A styrofoam block or a sturdy cup filled with M&M’s or rice to hold the cake pops upright
Ingredients
Buttercream Frosting
- ½ cup (1 stick) salted butter, softened
- 2 to 2 ½ cups powdered sugar
- 1 teaspoon vanilla extract
- 1 tablespoon heavy cream or milk
Cake Pops + Dipping Chocolate
- 15-ounce box white cake mix (prepare according to package directions in a 9×13″ pan)
- 10-ounce package pastel-colored melting wafers (choose your favorite pastel color)
- 10-ounce package white chocolate melting wafers (Ghirardelli is preferred)
- Food coloring (optional, for an extra pop of color)
- Optional decorations: sprinkles, jimmies, or any other desired festive adornments
Step-by-Step Instructions
1. Crafting the Buttercream Frosting
Why It Matters:
The homemade buttercream frosting not only acts as the adhesive that binds the cake crumbs together but also adds a rich, creamy flavor that enhances the overall taste of the cake pops.
How to Make It:
-
Whip the Butter:
In a stand mixer fitted with a paddle attachment, beat the softened salted butter until it becomes light and creamy. This usually takes about 1–2 minutes on medium speed. -
Incorporate the Sugar:
Gradually mix in 1 cup of powdered sugar until well combined. This initial incorporation ensures the frosting remains smooth and free of lumps. -
Add Flavor and Creaminess:
Pour in the vanilla extract and then slowly add more powdered sugar—around 1 to 1 ½ cups more—while continuing to beat the mixture. Finally, add the heavy cream or milk, one tablespoon at a time, to achieve a thick yet creamy consistency that holds its shape when piped or spooned. The ideal frosting should be able to hold a peak without drooping.
Tip: If you prefer a lighter texture or wish to expedite the process, you can substitute the homemade buttercream with 8 ounces of store-bought frosting. However, making your own lends a personal touch that elevates the taste.
2. Preparing the Cake Base
The Cake Itself:
The cake is the heart of your cake pops. Using a white cake mix makes for a neutral canvas that pairs wonderfully with the colorful coatings and decorations. Ensure that your cake is fully cooled before you begin crumbling it—this is crucial for achieving the right consistency.
Crumb It Up:
-
Once your cake has cooled completely, break it into fine crumbs using your hands or a fork in a large bowl. The goal is to create a crumbly texture that will easily combine with the buttercream.
-
Mix with Buttercream:
Add two spoonfuls of your homemade buttercream frosting to the cake crumbs. Using your hands or a sturdy spoon, mix the crumbs and frosting until the cake starts to come together. Gradually add more frosting as needed. You want the mixture to be moist enough to hold together when squeezed, but not so sticky that it becomes clumpy.
Note: The process of mixing cake crumbs with frosting is very forgiving—if you find your mixture too crumbly, simply add more frosting a little at a time until you achieve a smooth, cohesive dough.
3. Forming the Cake Pops
Shaping the Treats:
Once your cake mixture is ready, it’s time to form the cake pops. Using a medium cookie scoop, take a small portion of the cake mixture (about the size of a walnut) and roll it between your hands to form a perfect ball.
-
Uniformity is Key:
Aim to make each ball as uniform in size as possible to ensure even coating and a professional look. Place each cake ball on a plate as you finish them. -
Chill Out:
After forming all the cake balls, place the plate in the freezer for about 10 minutes. This step helps firm up the cake balls, making them easier to dip and less likely to crumble during the coating process.
4. Preparing the Dipping Chocolate
The Magic Coat:
The dipping chocolate is what transforms these cake balls into festive cake pops. It’s important to melt the chocolate properly to achieve a smooth, glossy finish.
- Melting Process:
Just before removing the cake pops from the freezer, prepare your dipping chocolate by placing the pastel-colored melting wafers in one microwave-safe bowl and the white chocolate melting wafers in another. Microwave each for 30 seconds at a time, stirring between intervals, until the chocolate is completely melted and smooth. If you’re feeling creative, add a few drops of food coloring to the melted chocolate to enhance its pastel appeal.
Tip: Avoid overheating the chocolate as it may become grainy. The goal is a silky texture that will adhere smoothly to the cake balls.
5. Assembling the Cake Pops
Inserting the Sticks:
-
Dipping the Stick:
To secure your cake pops, dip the end of a cake pop stick into the melted chocolate. This helps the chocolate act as a glue, ensuring the stick stays in place. -
Stick Insertion:
Immediately insert the dipped end of the stick into the cake ball. Repeat this process for all the cake pops. Once each cake pop has a stick, place them upright in a styrofoam block or a cup filled with M&M’s or rice. This keeps them stable while the chocolate sets.
Final Coating and Decoration:
-
Coating Process:
Dip each cake pop into the prepared dipping chocolate. You can either hold the cake pop by the stick or gently submerge it in the chocolate. Make sure to tap off any excess chocolate by gently tapping the stick against the side of the bowl. -
Decorative Touches:
Before the chocolate hardens, decorate your cake pops by sprinkling on festive decorations such as pastel sprinkles, jimmies, or even a drizzle of additional melted white chocolate. The decoration step is where your creativity shines—each cake pop can be personalized to reflect your Easter theme perfectly. -
Setting:
Allow the cake pops to sit for about 20 minutes or until the chocolate coating is firm and set. This ensures that they are sturdy enough for serving and handling.
Tips, Tricks, and Creative Variations
Enhancing the Flavor
-
Flavorful Additions:
Consider adding a pinch of cinnamon or a dash of almond extract to your buttercream for an extra layer of flavor that complements the sweetness of the cake. -
Different Cake Flavors:
Although this recipe calls for a white cake mix, don’t hesitate to experiment with other flavors. Chocolate cake, red velvet, or even lemon cake can be used to create unique and delicious variations of cake pops.
Customizing the Coating
-
Dual-Coating Technique:
For an extra indulgent treat, dip the cake pops in two layers of chocolate. After the first dip, allow the coating to set partially, then dip them again in a contrasting color or a mix of melted white and pastel chocolate. -
Texture Play:
To add a crunch to your cake pops, mix in finely chopped nuts or crushed cookies with the melted chocolate before dipping. This adds an unexpected texture that enhances the eating experience.
Creative Presentation Ideas
-
Decorative Displays:
Create a stunning centerpiece by arranging your cake pops in a decorative vase or a custom-made cake pop bouquet. This not only highlights the beauty of your creation but also serves as a conversation starter at your Easter table. -
Themed Platters:
Use festive platters or trays decorated with Easter motifs—think pastel colors, bunny figurines, or floral arrangements—to display your cake pops. This attention to detail will elevate your overall presentation.
Troubleshooting Common Issues
-
Crumbly Cake Balls:
If your cake mixture is too dry and the cake balls are crumbling, add a bit more buttercream. The mixture should be moist enough to hold together when squeezed. -
Chocolate Not Setting:
Ensure that you do not overheat your chocolate during the melting process. If the chocolate remains too runny, it may not coat the cake pops properly. Stir frequently and work quickly once the chocolate is melted. -
Stick Wobbling:
Dip the cake pop stick in chocolate before inserting it into the cake ball. This extra step helps secure the stick and keeps your cake pop stable during the dipping and decorating process.
Serving and Storage Suggestions
Party-Ready Treats
These Easter Cake Pops are perfect for any celebration. Their portable size makes them an excellent choice for party favors, grab-and-go snacks, or even a fun addition to an Easter brunch buffet. Arrange them on a platter or serve them in clear cups to show off their vibrant decorations and festive appeal.
Storage Tips
To keep your cake pops fresh:
- Store them in an airtight container in a cool place.
- They can be kept at room temperature for 3-4 days.
- If you need to store them for longer, consider refrigerating them, but let them come to room temperature before serving for the best flavor and texture.
The Joy of Creating and Sharing
Baking is as much about the process as it is about the final product. With these Easter Cake Pops, every step—from whipping up the buttercream to carefully dipping and decorating—offers a chance to enjoy the art of baking. Here are a few thoughts on why this recipe is so special:
-
Family Bonding:
Involve your children or friends in the process. Kids can help roll the cake balls, dip the sticks, and sprinkle on decorations. The shared experience of creating these treats can become a cherished holiday memory. -
Creative Expression:
The versatility of cake pops allows for endless creativity. Whether you stick to the traditional pastel theme or experiment with bold colors and different toppings, each batch is a reflection of your personal style and festive spirit. -
A Festive Feast for the Senses:
From the soft, moist cake inside to the smooth, shiny chocolate shell, each bite delivers a delightful mix of textures and flavors. The decorative sprinkles and jimmies not only add a burst of color but also an extra layer of sweetness that enhances the overall experience.
Final Thoughts: Make Your Easter Extra Special
Easter is a time for celebration, family, and a little bit of indulgence. They’re easy enough for beginners yet elegant enough to impress guests at any gathering. Whether you’re a seasoned baker or new to the world of cake pops, this recipe provides a fun and interactive way to create a dessert that’s both delicious and visually stunning.
As you embark on your cake pop adventure, remember to enjoy every step of the process. From preparing the buttercream frosting to dipping each cake ball in melted chocolate, you’re not just making a dessert—you’re crafting a memory that will bring smiles to your family’s faces for years to come.
So, gather your ingredients, set aside some time, and get ready to create a centerpiece that is as adorable as it is tasty. These cake pops are sure to be the star of your Easter celebration, a treat that marries tradition with a touch of modern fun and creativity.
Happy Easter, and happy baking!
Print
🌸🐰 Easter Cake Pops – A Sweet & Festive Treat! 🍡🎉
- Total Time: 1 hr
- Yield: 30
Ingredients
For the Buttercream Frosting:
✅ ½ cup (1 stick) salted butter, softened
✅ 2-2½ cups powdered sugar
✅ 1 tsp vanilla extract
✅ 1 tbsp heavy cream or milk
For the Cake Pops & Chocolate Coating:
✅ 1 box (15 oz) white cake mix, baked & cooled
✅ 10 oz pastel-colored melting wafers
✅ 10 oz white chocolate melting wafers (Ghirardelli preferred)
✅ Food coloring (optional)
✅ Sprinkles, jimmies, or other decorations
✅ 20 cake pop sticks
Instructions
1️⃣ Make the Frosting: Beat butter until creamy, then mix in powdered sugar, vanilla, and heavy cream until thick and smooth.
2️⃣ Prepare the Cake Balls: Crumble cooled cake into fine crumbs. Mix in 2 spoonfuls of buttercream and gradually add more until the cake holds together. Roll into balls and freeze for 10 minutes.
3️⃣ Melt the Chocolate: Microwave pastel and white melting wafers separately in 30-second intervals, stirring in between. Add food coloring if desired.
4️⃣ Assemble the Cake Pops: Dip a cake pop stick into melted chocolate, then insert it into a cake ball. Repeat for all cake pops and freeze for 20 minutes.
5️⃣ Dip & Decorate: Coat each cake pop in melted chocolate, tap off excess, and decorate with sprinkles or a drizzle of extra white chocolate.
6️⃣ Set & Serve: Place upright in a styrofoam block or a glass filled with M&M’s to set. Chocolate will harden in about an hour.
Notes
These cake pops are a must-have for Easter celebrations! 🐣💜 Who’s excited to try these? Let me know your favorite Easter treat! 🍬👇
- Prep Time: 40 min
- Cook Time: 20 minutes
Nutrition
- Calories: 110
- Fat: 6g
- Carbohydrates: 15g
- Protein: 1g